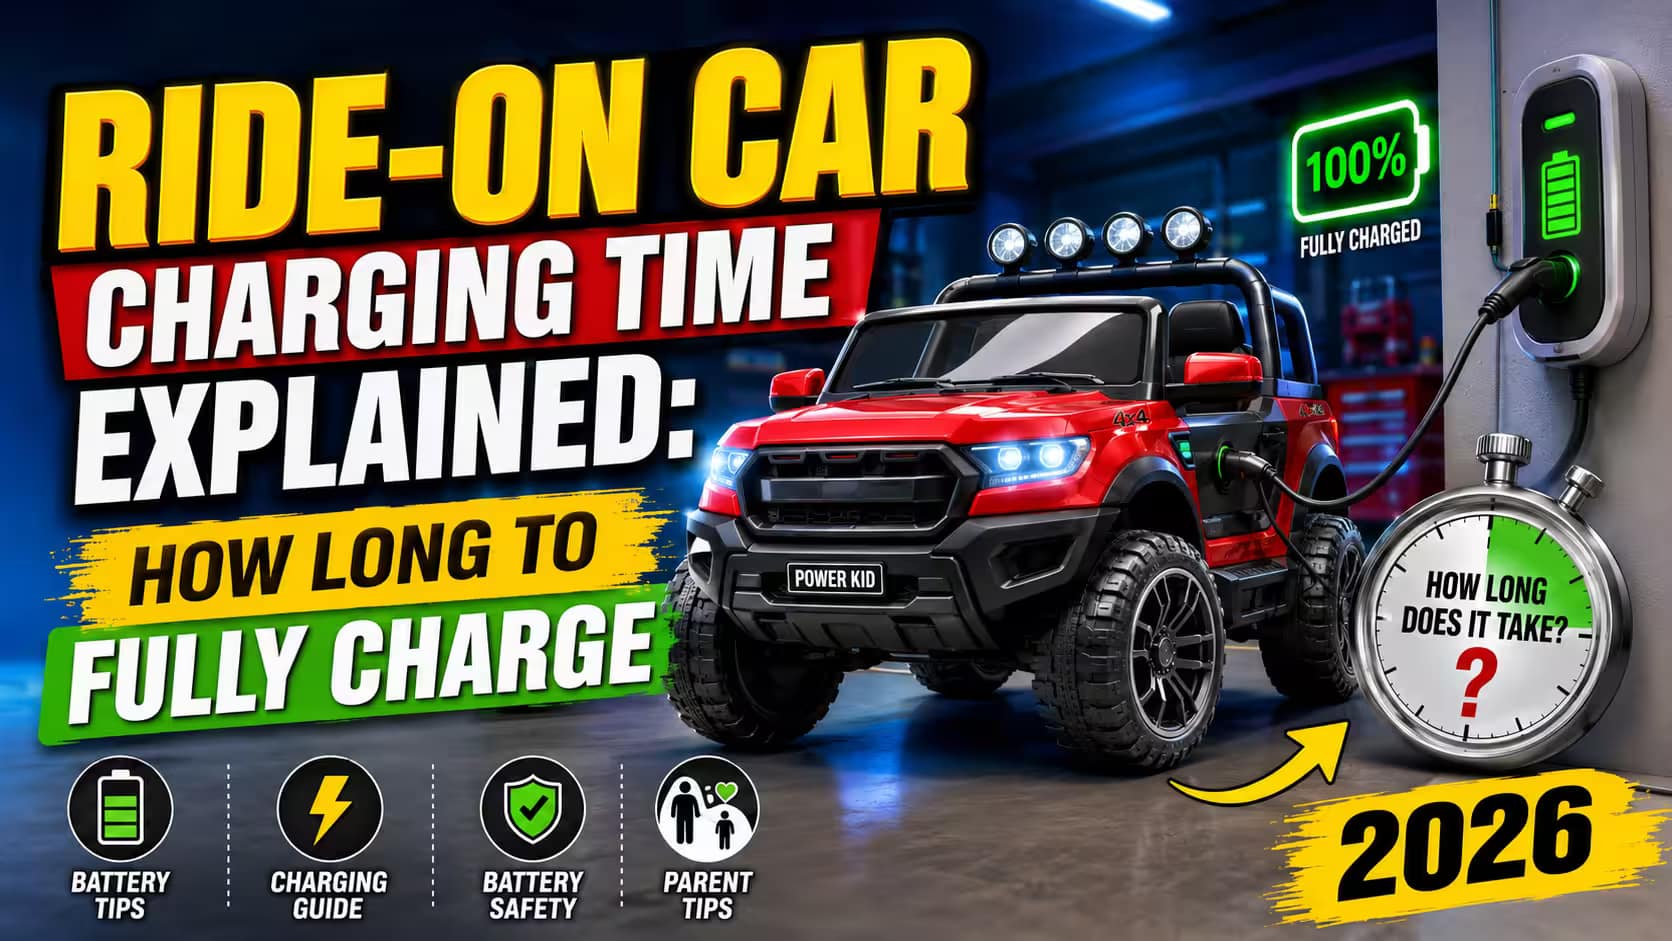
Ride-On Car Charging Time Explained How Long to Fully Charge 2026

Ride-On Car Charging Time Explained: How Long to Fully Charge 2026

Riding a mini electric car brings joy to children and even parents. But one question often causes confusion for new buyers and owners: How long should you charge a ride-on car? Understanding ride-on car charging time is not just about numbers. It’s about battery health, performance, and keeping your child’s playtime safe and fun. If you charge too little, the car stops mid-ride. If you overcharge, you risk damaging the battery. This guide covers everything you need to know, from first-time charges to expert tips, to ensure your ride-on car stays reliable for years.

What Is A Ride-on Car?

A ride-on car is a battery-powered vehicle designed for children. They look like real cars—some even have working lights, sounds, and remote controls. Kids can drive or parents can control them from a distance. Most ride-on cars use rechargeable batteries (typically 6V, 12V, or 24V). These cars come in different shapes, like sports cars, trucks, or jeeps. The battery size and type affect how long the car runs and how long it needs to recharge.

Why Charging Time Matters

Charging time is not a small detail. It affects how often your child can play and how long the car’s battery lasts. Charging for the wrong amount of time can cause:

  • Shorter playtime: Undercharged batteries run out fast.
  • Battery damage: Overcharging can shorten battery life or cause overheating.
  • Safety risks: Faulty charging increases the risk of battery leaks or fire.

Proper charging helps you avoid buying a new battery too soon and keeps playtime safe.

Types Of Ride-on Car Batteries

Most ride-on cars use one of three main battery types. Each has unique charging rules.

1. Lead-acid Batteries

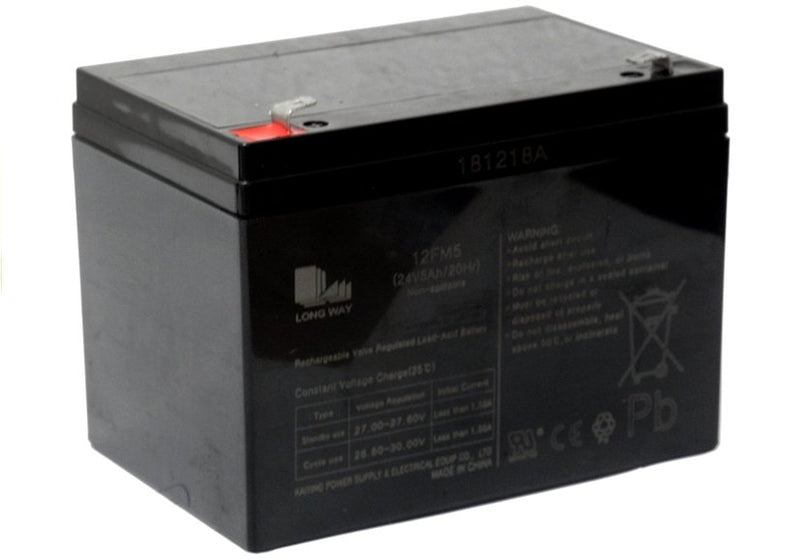
This is the most common type in ride-on cars. They are affordable and provide good power. Charging usually takes 8-12 hours. Lead-acid batteries are sensitive to overcharging, which can shorten their life.

2. Lithium-ion Batteries

Found in higher-end or newer models, lithium-ion batteries charge faster (often in 4-6 hours) and last longer. They are lighter and hold power better. But they can be expensive, and overcharging is a safety risk.

3. Nickel-metal Hydride (nimh) Batteries

These are less common but appear in some models. Charging time is between 6-10 hours. NiMH batteries are more stable than lead-acid, but not as efficient as lithium-ion.

Understanding your battery type helps you choose the correct charging time and avoid mistakes.

How Long To Charge A Ride-on Car

Charging time depends on several factors:

  • Battery voltage (6V, 12V, 24V)
  • Battery capacity (measured in Ah or mAh)
  • Type of battery
  • Charger output (in Amps)
  • Whether it’s the first charge or a regular charge

Let’s look at typical charging times for different ride-on car batteries.

Battery VoltageFirst ChargeRegular ChargeAverage Run Time
6V10-12 hours6-8 hours30-45 minutes
12V12-15 hours8-12 hours1-2 hours
24V14-18 hours10-16 hours2-4 hours

First-time Charging

When you first buy a ride-on car, the battery is not fully charged. Manufacturers recommend a longer first charge, usually between 10 to 18 hours, depending on the battery. This ensures all cells are activated and the battery reaches its full capacity.

Regular Charging

After the first charge, regular charging takes less time. The typical range is 6 to 16 hours, depending on the voltage and battery size. Always check the user manual for your specific model.

Key Insight: Charging Is Not Always Linear

A common beginner mistake is thinking that a higher voltage means longer charging. In reality, charger output (measured in Amps) and battery capacity (Ah) matter more. For example, a 12V battery with a 1A charger takes longer to charge than a 12V battery with a 2A charger.

Charging Time For Popular Ride-on Car Brands

Different brands have their own recommendations. Here’s a comparison of charging times for some top brands:

BrandVoltageFirst ChargeRegular Charge
Power Wheels12V14 hours8-10 hours
Best Choice Products12V12-15 hours8-10 hours
Rollplay6V/12V10-12 hours8-10 hours
Kid Trax12V14 hours8-12 hours
Razor24V18 hours12 hours

Always follow the brand’s instructions, as battery and charger specifications may vary even for the same voltage.

How To Tell When A Ride-on Car Is Fully Charged

Most ride-on car chargers come with a charging indicator light. This light helps you know when charging is complete:

  • Red light: Charging in progress
  • Green light: Fully charged

Some basic chargers do not have an indicator. In such cases, you must rely on the recommended time and avoid leaving the battery connected longer than necessary.

Why Don’t All Chargers Stop Automatically?

Not all ride-on car chargers have automatic shut-off. Some older or cheaper models require you to unplug manually. For safety, set a timer or alarm to remind you to disconnect after the recommended time.

Ride-On Car Charging Time Explained: How Long to Fully Charge
Ride-On Car Charging Time Explained: How Long to Fully Charge 2026 4

Factors That Affect Ride-on Car Charging Time

Charging time is not always the same. These factors can make a difference:

1. Battery Age And Condition

An old or worn-out battery charges more slowly and holds less power. If charging seems to take much longer, it may be time to replace the battery.

2. Temperature

Charging in very cold or hot places can affect battery performance. Batteries charge best at room temperature (around 20°C or 68°F).

3. Charger Quality

A low-quality or wrong charger may take longer or even damage the battery. Always use the charger that came with your ride-on car or an approved replacement.

4. Battery Size (capacity)

Larger batteries (measured in ampere-hours, Ah) take longer to charge, even if they have the same voltage.

5. How Empty The Battery Is

If you charge after every short ride, the battery will need less time. If you let the battery run down completely, charging will take longer.

6. Power Source

Weak or unstable electrical outlets can slow down charging. Plug your charger directly into a wall outlet, not a power strip or extension cord.

Step-by-step Guide: How To Charge A Ride-on Car

Charging a ride-on car is simple, but following the right steps keeps your battery healthy and your child safe.

  • Turn off the car: Always switch off the car before charging.
  • Locate the battery/charging port: Some cars have an external port; others need you to open a compartment.
  • Connect the charger: Plug the charger into the battery or port, then into the wall.
  • Check indicator lights: If available, see if the light turns on.
  • Set a timer: Avoid overcharging by setting an alarm for the correct duration.
  • Unplug after charging: When the light turns green or the timer ends, unplug the charger.
  • Store correctly: Let the battery cool for a few minutes before use.

Practical Example

Suppose you have a 12V ride-on car with a 10Ah battery and a 1A charger. According to the formula:

Charging Time = Battery Capacity (Ah) ÷ Charger Output (A) × 1. 2 (for efficiency loss)

So, 10 ÷ 1 × 1. 2 = 12 hours. This matches the typical 8-12 hour recommendation.

Ride-On Car Charging Time Explained: How Long to Fully Charge
Ride-On Car Charging Time Explained: How Long to Fully Charge 2026 5

How To Maximize Battery Life

Charging time is only one part of battery care. To get the most from your ride-on car’s battery:

  • Charge after each use: Don’t wait until the battery is empty.
  • Never overcharge: Unplug after the recommended time.
  • Store charged: Before storing for weeks, fully charge the battery.
  • Avoid extreme temperatures: Store and charge at room temperature.
  • Use the right charger: Never mix chargers from different brands or voltages.

Non-obvious Tip: Partial Charges Are Ok

Many parents think you must always fully drain the battery before recharging. This is a myth for modern ride-on cars. In fact, partial charging is safe and helps extend battery life, especially for lithium-ion batteries.

Common Charging Mistakes And How To Avoid Them

Even experienced owners make charging errors. Here are some of the most common mistakes and how to avoid them:

1. Overcharging The Battery

Leaving the charger connected overnight, every night, will damage the battery. Use a timer or choose a charger with automatic shut-off.

2. Using The Wrong Charger

Using a charger with the wrong voltage or current can ruin the battery or make charging unsafe. Only use chargers designed for your model.

3. Ignoring The First Charge

Skipping or shortening the first-time charge reduces the battery’s maximum capacity. Always follow the manual for the first charge.

4. Charging In Extreme Temperatures

Charging in a hot garage or freezing basement hurts battery health. Try to charge indoors at room temperature.

5. Letting The Battery Discharge Completely

Letting the battery die before every charge is hard on lead-acid batteries. Charge after each use, even if the battery is not empty.

6. Not Checking Connections

Loose plugs or dirty terminals slow charging and may cause overheating. Check that all connections are clean and tight.

How To Identify Charging Problems

Sometimes, things don’t go as planned. Watch for these signs:

  • Battery doesn’t charge or run time drops: Battery may need replacement.
  • Charger gets hot or smells: Stop charging, check for a faulty charger.
  • No indicator light: Charger or battery could be faulty.
  • Car runs weak even after full charge: Battery may have lost capacity.

If you suspect a problem, try a different charger or battery if possible. If issues continue, consult the manufacturer’s support.

Can You Overcharge A Ride-on Car?

Yes, overcharging is a real risk, especially with lead-acid batteries. Overcharging can cause:

  • Shorter battery life
  • Swollen or leaking batteries
  • Fire risk in rare cases

Most modern chargers have automatic shut-off, but not all do. Always check your charger type and never leave it plugged in for days.

Differences Between Fast Charging And Standard Charging

Some parents want a faster charge for more playtime. But fast charging is not always better.

Standard Charging

Most ride-on cars use standard chargers (around 1A output). This is safest for the battery and gives longer life.

Fast Charging

Some high-end models or aftermarket chargers offer fast charging (2A or higher). While it charges the battery faster, it can generate heat and reduce battery life if used often. Only use a fast charger if the manufacturer recommends it.

Charging Ride-on Cars: Indoors Vs Outdoors

Always charge ride-on cars indoors if possible. Charging outdoors exposes the charger and battery to moisture, temperature swings, and dirt, which can cause damage or safety risks.

Ride-on Car Charging And Safety

Safety should always come first. Here are key safety points:

  • Inspect chargers and wires regularly for damage.
  • Do not use damaged batteries—replace them immediately.
  • Keep the charging area dry to avoid electrical hazards.
  • Supervise charging, especially with young children around.
  • Do not cover the charger or battery while charging, to prevent overheating.

For more on battery safety, see this guide from the U.S. Consumer Product Safety Commission.

Seasonal Charging And Storage Tips

Ride-on cars are often put away during winter or long vacations. Proper storage keeps the battery healthy.

  • Charge fully before storage: Never store a dead battery.
  • Recharge every 1-2 months: Even when not in use, batteries slowly lose charge.
  • Store in a cool, dry place: Avoid garages, sheds, or attics with extreme temperatures.
  • Disconnect the battery: If possible, remove and store the battery separately from the car.

How Battery Size Affects Charging Time And Playtime

Battery size is usually listed in ampere-hours (Ah). A higher Ah rating means more energy storage, which gives longer playtime but needs more time to charge.

For example, a 12V 7Ah battery and a 12V 10Ah battery use the same voltage but the 10Ah battery will last longer and take longer to charge.

Battery Size (Ah)Charger Output (A)Estimated Charging Time (hours)Estimated Run Time (minutes)
7Ah1A8-1060-90
10Ah1A12-1490-120
14Ah1A16-18120-150

This is why two cars with the same voltage can have different charging times and playtimes.

Signs Your Ride-on Car Battery Needs Replacement

Even with perfect charging, batteries do not last forever. Here’s when you should consider buying a new one:

  • Reduced run time: Car runs for much less time than before.
  • Battery won’t hold a charge: Even after charging fully.
  • Physical signs: Swelling, leaking, or corrosion on battery.
  • Charger indicator never turns green: Battery not accepting charge.

Most ride-on car batteries last 1-3 years, depending on use and care.

Upgrading Your Ride-on Car Battery

Some parents want longer playtime by upgrading the battery. You can usually upgrade from a 6V to a 12V battery, but only if:

  • The car’s motor and electronics can handle the higher voltage.
  • You use a matching charger.
  • The battery fits securely in the compartment.

Never upgrade to a higher voltage without checking with the manufacturer or a qualified technician. Wrong upgrades can damage the car or cause safety hazards.

Frequently Asked Questions

How Long Should I Charge My Ride-on Car The First Time?

For most ride-on cars, the first charge should last 10-18 hours. This helps the battery reach its full capacity. Check your car’s manual for the exact time.

Can I Leave The Battery Charging Overnight?

It is not safe to leave most ride-on car batteries charging overnight unless your charger has automatic shut-off. Overcharging can damage the battery and, in rare cases, cause safety issues.

How Can I Tell If My Ride-on Car Battery Is Fully Charged?

Most chargers have a green indicator light that turns on when charging is finished. If your charger has no light, follow the recommended charging time in your user manual.

What Happens If I Overcharge The Ride-on Car Battery?

Overcharging can shorten battery life, cause swelling or leaking, and may even damage the car’s electronics. Always unplug the charger after the recommended time.

How Often Should I Charge The Ride-on Car Battery?

For the longest battery life, charge after each use. Even if the battery is not fully empty, it is better to keep it topped up, especially for lead-acid and lithium-ion batteries.

Keeping your ride-on car’s battery in good shape is simple if you follow these charging tips. With careful charging habits, your child’s favorite car will be ready to roll whenever adventure calls.


Ride-On Car Charging Time Explained: How Long to Fully Charge
Ride-On Car Charging Time Explained: How Long to Fully Charge 2026 6

Can Ride-On Cars Go Uphill What Parents Need to Know 2026

Can Ride-On Cars Go Uphill? What Parents Need to Know 2026

Many parents and kids love the excitement of ride-on cars. These small vehicles can look like sports cars, trucks, or even construction machines. They are fun and help kids learn about driving, balance, and coordination. But one question parents often ask is: Can ride-on cars go uphill? This is a practical concern, especially if your home, park, or driveway has slopes or uneven ground. No one wants a toy that gets stuck halfway up a small hill or, worse, rolls back and causes frustration or danger.

In this article, you’ll get a clear, full answer to this question. We’ll explore how ride-on cars work, what affects their ability to climb, the different types of ride-on cars, and how slopes impact performance. You’ll find real examples, data, and tips for choosing a model that fits your needs.

We’ll also touch on safety, maintenance, and common mistakes that many buyers make. By the end, you’ll have all the information you need to make a confident decision and avoid disappointment.

How Ride-on Cars Move

To understand if a ride-on car can go uphill, it helps to know how these toys work. Ride-on cars are powered by small electric motors. These motors use batteries, usually 6V, 12V, or 24V. The battery sends power to the motor, which turns the wheels.

Some ride-on cars are simple—just a single motor for all the wheels. Others, especially bigger models, have one motor for each rear wheel. This gives more power and better control, especially on rough ground.

The way the power gets to the wheels matters. Cheaper cars often have plastic gears, which can break if you push them too hard. Higher-quality cars use metal gears, which last longer and handle slopes better.

The weight of the child, the type of surface (grass, concrete, gravel), and the steepness of the hill all affect performance. Even the weather (wet grass is slippery!) Can change how well a car climbs.

Types Of Ride-on Cars And Their Climbing Power

Not all ride-on cars are the same. Here’s how different types compare when it comes to going uphill:

Battery Voltage

  • 6V ride-on cars: These are for young kids (usually ages 2–4). They move slowly and are best for flat, smooth surfaces. Most cannot climb hills.
  • 12V ride-on cars: The most common type. They can handle small slopes (usually up to 10% grade) and short grass. Good for driveways and small yards.
  • 24V ride-on cars: These are powerful models, often for older kids or two riders. They can climb steeper slopes (up to 15% or sometimes 20%), depending on weight and surface.

Motor Power And Number

  • Single-motor models: Less power, usually struggle on hills.
  • Dual-motor models: Each back wheel has its own motor. They handle slopes better and rarely get stuck.
  • Four-motor (4WD) models: All wheels have motors. These climb best and are made for rough or hilly terrain.

Car Size And Weight

Larger cars may have more power, but they are heavier. If a car is too heavy for the motor, it will not climb well. Always check the manufacturer’s recommended weight limit and compare it to your child’s size.

Wheel Material

  • Plastic wheels: Cheap and common but slip easily on grass, gravel, or wet ground.
  • Rubber wheels: Provide better grip and traction, especially on slopes.
  • EVA foam wheels: Soft, quiet, and good for both indoor and outdoor use. Some models have real air-filled tires for maximum grip.

Example: Real-world Climbing Performance

Let’s compare three popular ride-on cars for their hill-climbing ability:

ModelVoltageDrive SystemMax Slope (Approx.)Wheel Type
Power Wheels Jeep Wrangler12V2WD10%Plastic
Peg Perego Polaris RZR24V2WD17%Rubber
Best Choice Products 4WD Truck12V4WD15%EVA Foam

As you see, more voltage, better wheels, and 4WD help a lot with climbing.

Can Ride-On Cars Go Uphill? What Parents Need to Know
Can Ride-On Cars Go Uphill? What Parents Need to Know 2026 10

What Limits Ride-on Cars On Hills?

Even the best ride-on car has limits when climbing slopes. Here are the main reasons:

  • Motor Power: Small motors can only push so much weight. If the hill is too steep, the motor may stall or overheat.
  • Traction: If the wheels slip, the car cannot climb. Wet grass, loose gravel, or mud make climbing harder.
  • Weight: Heavier kids (or two riders) need more power to go uphill. Too much weight can drain the battery and stress the motor.
  • Battery Life: Climbing uses more battery than flat driving. If you climb often, the battery will run down faster.
  • Heat Build-Up: Motors can overheat if they work too hard, especially on long hills. Some cars have safety cutoffs that stop the car if it gets too hot.

How Steep Is Too Steep?

Manufacturers often list the maximum slope a ride-on car can handle in degrees or percent. But what does that mean?

  • A 10% slope means the ground rises 10 units for every 100 units forward (about 5.7 degrees).
  • A 15% slope is steeper (about 8.5 degrees).
  • Most home driveways are less than 10%. But some parks and yards can be more.

If your yard has a steep hill, measure it before buying. Most ride-on cars are not meant for very steep slopes. For safety, it’s best to keep to gentle slopes (under 15%).

Real-world Example: Climbing A Slope

Let’s say you have a 12V ride-on car with a 50 kg weight limit. Your child weighs 20 kg. The backyard has a small hill (10% slope), covered with grass.

  • On dry grass, the car will probably climb slowly but make it up.
  • If the grass is wet, the wheels may spin and slip.
  • If the hill is longer than 10 meters, the car might slow down or the battery will drain faster.

If you have a 24V model with rubber wheels, the car will climb faster and handle wet grass better.

Factors That Affect Climbing Performance

Let’s look deeper at the main factors:

1. Battery Voltage And Condition

A fully charged battery gives the most power. If the battery is old, weak, or not fully charged, the car will struggle on hills. Always start with a full battery and check it often.

2. Motor Quality

Not all motors are the same. Some brands use stronger, longer-lasting motors. Others use cheap motors that slow down or break after a few climbs. It’s better to pay a bit more for quality.

3. Weight Distribution

If most of the weight is over the back wheels (where the motor is), the car climbs better. If the car is unbalanced, one wheel may lose grip and spin.

4. Surface Type

Smooth pavement is easiest for ride-on cars. Grass, gravel, sand, or dirt slow the car down and make climbing harder. Wet or muddy surfaces are the hardest.

5. Wheel Material And Size

Bigger wheels roll over bumps and holes better. Rubber tires grip better than plastic. Some high-end models have suspension systems to keep the wheels on the ground for more grip.

6. Rider Weight

If your child is close to the car’s weight limit, it will climb slower and may stop on big hills. Always check the maximum load before buying.

Can Ride-On Cars Go Uphill? What Parents Need to Know
Can Ride-On Cars Go Uphill? What Parents Need to Know 2026 11

Safety Issues: Climbing Hills With Ride-on Cars

Safety is very important. Climbing a hill in a ride-on car is not the same as on a bike or scooter. Here are some key points:

  • Risk of Rolling Back: If the car stops on a hill, it can roll backward. This is dangerous, especially if there are obstacles or other kids behind.
  • Tip-Over Risk: Steep hills can make the car tip over. This is more likely with three-wheelers or tall cars with a high center of gravity.
  • Brake Power: Most ride-on cars use an electronic brake. When your child lets go of the pedal, the car stops. But on a slope, this may not be enough, and the car can still roll.
  • Remote Control Override: Many models have a parent remote. This lets you stop the car if your child is in trouble. Always use this feature on hills.

Improving Hill Climbing For Your Ride-on Car

Maybe you already have a car, and it struggles with hills. Here are practical ways to help:

1. Upgrade The Battery

If your car uses a 6V or 12V battery, check if you can upgrade to a higher voltage (only if the motor and electronics can handle it). A bigger battery gives more power and longer run time.

2. Switch To Better Wheels

If your car has plastic wheels, consider buying rubber or EVA foam wheels. These give more grip on grass and slopes. Some online stores sell upgrade kits.

3. Reduce Weight

Remove any extra items from the car. Only one child should ride at a time, especially on hills.

4. Use The Right Gear

Some ride-on cars have a “high” and “low” speed. Use low speed for climbing. It gives more torque (force) to the wheels.

5. Keep The Battery Fully Charged

A weak battery gives less power. Charge after each use, and replace old batteries.

6. Drive On Dry Ground

Wet grass and mud make climbing much harder. Try to use the car when the ground is dry.

7. Supervise Closely

Always watch your child on hills. Stand behind the car, not in front. Be ready to help if the car stops or rolls back.

Ride-on Cars Vs. Other Kids’ Vehicles On Hills

How do ride-on cars compare to pedal cars, scooters, or bikes on hills? Here’s a quick look:

Vehicle TypeHill Climbing AbilityPower SourceControl
Ride-On Car (Electric)Fair (depends on model)BatteryLow–Medium
Pedal CarGood (strong kids only)Leg PowerHigh
BicycleVery GoodLeg PowerHigh
Scooter (Manual)PoorLeg PowerMedium
Scooter (Electric)Good (more powerful motors)BatteryMedium

Ride-on cars are fun but not built for big hills. Bikes and pedal cars give more control and power, but require more skill and strength.

Choosing A Ride-on Car For Hilly Yards

If you know your child will drive on slopes, pick your ride-on car carefully. Here’s what matters:

1. Choose Higher Voltage

A 24V model is much better for hills than a 6V or 12V. It gives more power and speed.

2. Pick 4wd (all-wheel Drive)

If you can, get a 4WD ride-on car. Each wheel gets power, so the car rarely gets stuck.

3. Check Wheel Quality

Look for rubber or EVA foam wheels. Avoid all-plastic wheels unless you only drive on smooth pavement.

4. Weight Limit

Pick a car with a weight limit at least 20% higher than your child’s weight. This gives the motor extra power for climbing.

5. Suspension

Some models have shock absorbers. This keeps the wheels on the ground for better grip on bumps and hills.

6. Remote Control Feature

For young kids, a parent remote adds safety on hills. You can stop or steer the car if needed.

7. Real User Reviews

Check online reviews for comments about hill climbing. Look for real-world feedback, not just the manufacturer’s claims.

Common Mistakes When Using Ride-on Cars On Hills

Even experienced parents can make errors. Here are mistakes to avoid:

  • Ignoring the Weight Limit: Adding extra kids or heavy bags makes climbing much harder.
  • Using on Wet Grass: Slippery surfaces reduce grip and can cause accidents.
  • Not Supervising: Kids can panic if the car rolls back or gets stuck.
  • Skipping Maintenance: Old batteries and worn wheels reduce climbing power.
  • Forcing the Car: If the car stops, don’t keep pressing the pedal. This can burn out the motor.
  • Assuming All Cars Are Equal: A cheap 6V car cannot climb like a 24V 4WD truck.
  • Not Measuring Your Hill: Some yards look flat but have steep spots. Check before buying.

How To Measure Your Slope

Before you buy, it’s good to know how steep your hill is. Here’s a simple way:

  • Place a long, straight board or stick on the slope.
  • Put one end at the bottom of the hill, and lift the other end until the board is level.
  • Measure the height from the ground to the bottom of the raised end (call this “rise”).
  • Measure the length of the board (call this “run”).
  • Slope (%) = (rise ÷ run) × 100.

If the slope is more than 15%, most ride-on cars will struggle.

Maintenance Tips For Best Climbing Performance

To keep your ride-on car climbing well, regular care is needed:

1. Charge The Battery Correctly

Never let the battery run completely flat. Charge after each use, and store in a cool, dry place.

2. Check The Wheels

Look for cracks or flat spots. Clean off mud, grass, and stones after each drive.

3. Listen For Noises

Grinding or clicking sounds mean gears or motors may be wearing out. Fix problems early to avoid bigger repairs.

4. Clean Electrical Contacts

Battery connectors can get dirty. Wipe with a dry cloth to keep power flowing smoothly.

5. Store Properly

Keep the car indoors or under cover. Sun, rain, and cold can damage the battery and wheels.

When To Avoid Hills Completely

Some situations are just not safe for ride-on cars on hills:

  • Very steep slopes (>15%)
  • Loose gravel or sand
  • Wet, muddy, or icy ground
  • If your car has a weak or old battery
  • If your child is close to the weight limit

In these cases, stick to flat ground for safe, happy driving.

Expert Tips For Safe Hill Climbing

Here are two tips most beginners miss:

  • Try Climbing in Short Bursts: If the hill is long, drive up a little, then stop and let the motor cool. This prevents overheating.
  • Teach Your Child to Steer Straight: Zig-zagging makes the car work harder and lose grip. Going straight up or down is safer.

Are Ride-on Cars Good For Hilly Neighborhoods?

If you live in a hilly area, ride-on cars can still be fun, but only if you pick the right model. A cheap or underpowered car will lead to frustration. A powerful, high-quality car can climb small hills and give your child a great experience.

But remember: even the best ride-on cars have limits. They are toys, not real vehicles. Always put safety first and supervise your child, especially on slopes.

Frequently Asked Questions

What Slope Can Most Ride-on Cars Climb?

Most standard ride-on cars can handle slopes up to 10% (about 5–6 degrees). Some high-end 24V or 4WD models can climb up to 15–17% if the ground is dry and the child is not too heavy.

Can I Upgrade My Ride-on Car To Climb Hills Better?

Yes, you can often upgrade the battery or switch to better wheels (like rubber or EVA foam). But you must make sure the motor and wiring can handle more power. Upgrading plastic gears to metal is also possible on some models.

Are Ride-on Cars Safe On Hills?

Ride-on cars are generally safe on gentle slopes, but there is a risk of rolling back or tipping over on steeper hills. Always supervise your child and use the parent remote if available.

Which Brands Make The Best Hill-climbing Ride-on Cars?

Brands like Peg Perego, Best Choice Products, and Rollplay are known for good motors and strong wheels. Always check reviews for real-life hill climbing results.

Where Can I Find More Technical Details About Ride-on Cars?

You can learn more about the mechanics and safety of ride-on vehicles on the Wikipedia Electric Vehicle page.

Final Thoughts

So, can ride-on cars go uphill? The answer is: yes, but with limits. The size of the hill, type of car, battery, wheels, and your child’s weight all matter. For gentle slopes, most 12V cars will do fine. For bigger hills, look for 24V and 4WD models with rubber wheels. Always think about safety, supervise your child, and pick a model that fits your yard and needs. With the right car and some planning, your child can have hours of safe, exciting outdoor fun—even on a hill.

Can Ride-On Cars Go Uphill? What Parents Need to Know
Can Ride-On Cars Go Uphill? What Parents Need to Know 2026 12

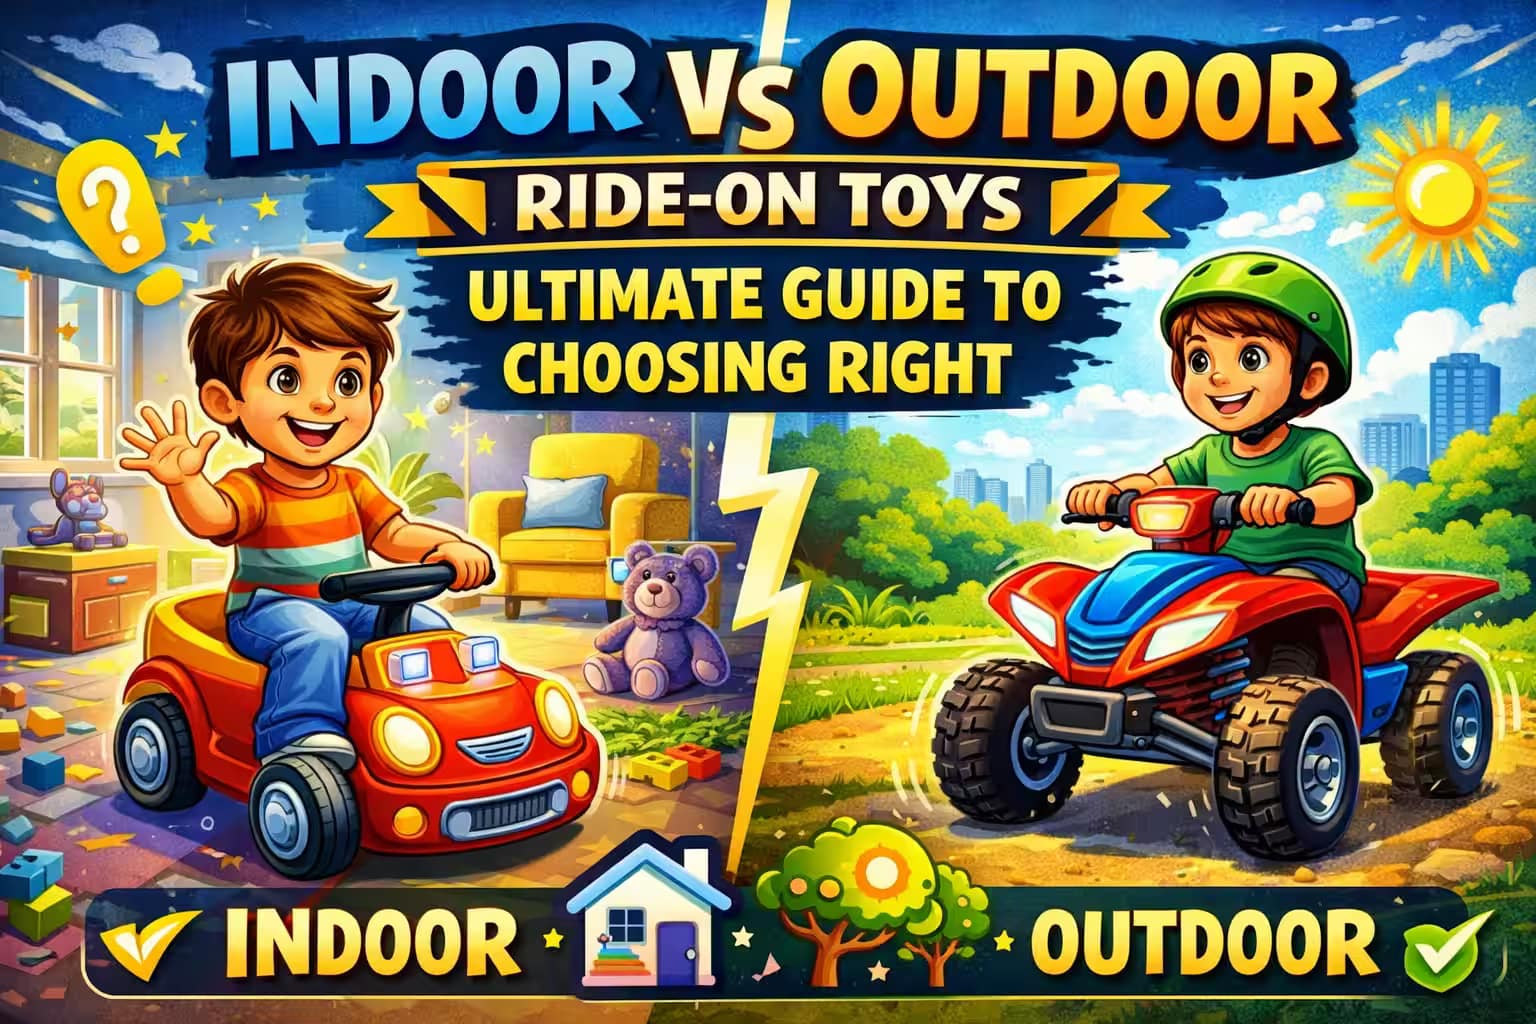
Indoor Vs Outdoor Ride-On Toys Ultimate Guide to Choosing Right

Indoor Vs Outdoor Ride-On Toys: Ultimate Guide to Choosing Right

Choosing between indoor and outdoor ride-on toys can feel tricky when you want the best for your child’s fun and development. You might be wondering: which option keeps your little one engaged longer?

Which one fits better in your space? And how can you make sure the toy offers both safety and excitement? You’ll discover the key differences between indoor and outdoor ride-on toys, helping you make a smart choice that suits your child’s needs and your lifestyle.

Keep reading to find out how to pick the perfect ride-on toy that sparks creativity, encourages active play, and brings joy to your home—whether inside or outside.

Indoor Vs Outdoor Ride-On Toys: Ultimate Guide to Choosing Right
Indoor Vs Outdoor Ride-On Toys: Ultimate Guide to Choosing Right 16

Credit: metalian.ch

Indoor Ride-on Toys

Indoor ride-on toys offer a fun way for children to stay active inside the home. These toys are designed to be used on flat, smooth surfaces like floors and carpets. They come in various styles and sizes, making them suitable for different age groups. Indoor ride-ons help kids develop motor skills and coordination while keeping them entertained safely indoors.

Popular Types

Common indoor ride-on toys include push cars, scooters, and rocking horses. Battery-operated cars are also popular, providing powered movement for added excitement. Some toys feature interactive elements like buttons and sounds to engage children further. Compact designs make these toys easy to use in smaller spaces.

Benefits For Kids

Indoor ride-on toys promote physical activity and improve balance. They encourage imaginative play and social interaction with family members. These toys boost confidence as children learn to control their movements. Using ride-ons indoors allows kids to play regardless of weather conditions.

Safety Considerations

Choose ride-on toys with smooth edges and sturdy construction. Ensure the toy matches the child’s age and weight limits. Supervise playtime to prevent accidents and collisions. Use soft mats or carpets to cushion any falls. Remove obstacles from the play area to create a safe environment.
Space Requirements

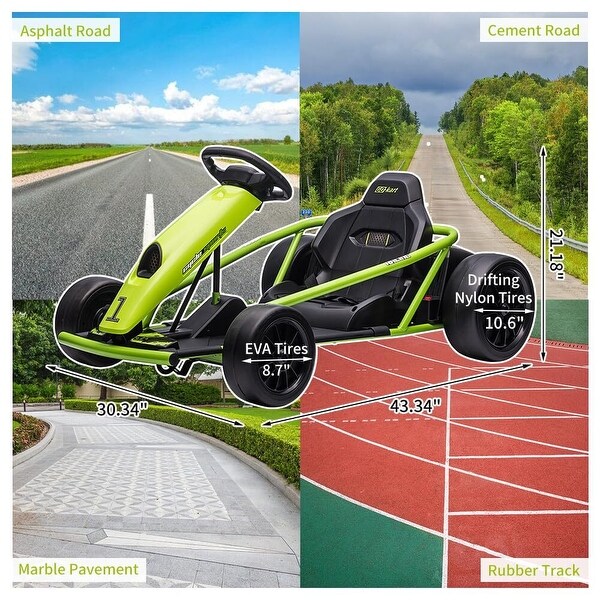
Indoor ride-on toys need clear, open spaces to move freely. Hallways, living rooms, or playrooms work well for these toys. Keep the area tidy to avoid tripping hazards. Measure the space before buying to ensure the toy fits comfortably. Small ride-ons suit tighter spaces better than larger models.

Indoor Vs Outdoor Ride-On Toys: Ultimate Guide to Choosing Right
Indoor Vs Outdoor Ride-On Toys: Ultimate Guide to Choosing Right 17

Credit: us.amazon.com

Outdoor Ride-on Toys

Outdoor ride-on toys bring excitement and adventure to children’s playtime. These toys encourage kids to explore fresh air and open spaces. They offer a chance to enjoy physical activity while having fun. Parents often choose outdoor ride-ons to combine play with exercise and nature.

Common Models

Popular outdoor ride-on toys include pedal cars, scooters, and battery-powered vehicles. Some models resemble real cars, trucks, or motorcycles. Others are simple push or balance bikes. These toys come in various sizes to suit toddlers and older children alike.

Physical Development Benefits

Riding outdoor toys helps children build strength and coordination. It improves balance and motor skills through active play. Kids develop better spatial awareness while navigating different surfaces. Outdoor ride-ons promote healthy exercise habits from an early age.

Durability And Weather Resistance

Outdoor ride-on toys are made with strong, weatherproof materials. Plastic and metal parts resist sun, rain, and dirt. Tires are designed to handle rough surfaces like grass and gravel. This durability ensures toys last longer despite outdoor use.

Suitable Outdoor Spaces

Ideal places for outdoor ride-ons include driveways, sidewalks, and parks. Large yards with flat areas offer safe riding environments. Open spaces reduce the risk of collisions or injuries. Some ride-ons perform well on uneven terrains, expanding play options.

Key Differences

Ride-on toys bring joy and active play to children. Choosing between indoor and outdoor ride-on toys depends on various factors. Understanding their key differences helps parents pick the right option. These differences include where they are used, their material, upkeep needs, and the child’s age and skills.

Usage Environment

Indoor ride-on toys are designed for smooth, flat surfaces like floors and carpets. They are smaller and quieter to avoid noise inside the house. Outdoor ride-on toys handle rougher surfaces like grass, pavement, or dirt. They are larger and built for open spaces, giving more room to move freely.

Material And Build

Indoor ride-on toys often use lightweight plastic to protect floors and reduce noise. They have smaller wheels and simpler designs for safe indoor use. Outdoor ride-on toys are made with stronger materials like metal and durable plastic. They have bigger wheels and sturdy frames to endure weather and rough play.

Maintenance Needs

Indoor ride-on toys need less maintenance since they stay clean and dry. Wiping them with a cloth keeps them ready to use. Outdoor ride-on toys require more care due to exposure to dirt and weather. They need regular cleaning and checking for wear or rust to stay safe.

Age And Skill Levels

Indoor ride-on toys suit younger children with basic motor skills. They are easy to steer and control in small spaces. Outdoor ride-on toys fit older kids who enjoy faster speeds and more challenging terrain. They help build balance and coordination with more complex controls.
Indoor Vs Outdoor Ride-On Toys: Ultimate Guide to Choosing Right
Indoor Vs Outdoor Ride-On Toys: Ultimate Guide to Choosing Right 18

Credit: kidscarsales.com.au

Choosing The Right Toy

Choosing the right ride-on toy requires careful thought. The perfect toy matches the child’s needs and the play environment. It should also fit your budget and keep safety in mind. Consider these key factors to find the best indoor or outdoor ride-on toy.

Child’s Age And Interests

Age matters for ride-on toys. Younger children need simple, slow models with easy controls. Older kids can handle faster, more complex toys. Interests shape the type of ride-on toy. Some kids like cars, others prefer animals or bikes. Pick a toy that sparks their excitement and fits their abilities.

Available Space

Space limits the choice of ride-on toys. Indoor toys should be small and quiet to avoid damage. Outdoor toys can be bigger and faster, designed for open areas. Measure your available space before buying. This helps prevent problems and keeps play safe and fun.

Safety Features

Safety is a top priority for ride-on toys. Look for sturdy construction and stable design. Check for seat belts, speed limits, and smooth edges. Make sure the toy meets safety standards. Proper safety features protect children and give parents peace of mind.

Budget Considerations

Budget affects the type of toy you can buy. Indoor ride-ons often cost less than outdoor ones. Decide how much you want to spend before shopping. Quality matters more than price. Choose a durable toy that lasts and offers good value for money.

Toy Rotation Benefits

Rotating ride-on toys brings many benefits for both indoor and outdoor play. It helps keep the play area neat and keeps children interested in their toys longer. Switching toys regularly encourages children to use their imagination more. It also makes cleaning up simpler and faster.

Reducing Clutter

Keeping fewer toys out at once means less mess. Children do not feel overwhelmed by too many choices. It creates more space for safe play. Storing some toys away keeps the room tidy and organized. Fewer toys in sight also help parents manage the play area better.

Enhancing Engagement

Rotating toys keeps children curious and excited. They focus more on the toys available. Playing with fewer toys helps kids explore deeper. This leads to longer and more meaningful play sessions. Toys feel new again after being stored for a while.

Encouraging Creativity

Limited toys push children to imagine new ways to play. They combine toys and invent stories or games. Rotation stops boredom and sparks creative thinking. Children learn to use their minds rather than just the toys. This builds problem-solving and imaginative skills.

Simplifying Cleanup

A smaller number of toys makes tidying faster. Children find it easier to put toys away. Parents spend less time managing the play space. Cleanup becomes a simple part of playtime. This routine helps teach responsibility and order.

Tips For Parents

Choosing between indoor and outdoor ride-on toys can be tricky for parents. Making the right choice helps children enjoy playtime safely. Parents can guide this process with simple strategies. These tips ensure kids have fun while learning and staying active.

Involving Kids In Selection

Let your child join in choosing their ride-on toy. Ask about their favorite colors and styles. This builds excitement and gives them a sense of control. Explain how different toys work indoors and outdoors. It helps them understand where each toy is best used.

Balancing Quality And Quantity

Focus on getting a few good quality toys instead of many cheap ones. Durable toys last longer and offer better safety. Choose toys that encourage creativity and physical activity. Avoid clutter that can overwhelm your child and your home.

Monitoring Toy Usage

Keep an eye on how your child uses their ride-on toys. Make sure they play in safe areas suitable for the toy. Set clear rules for indoor and outdoor use. Check toys regularly for any damage or wear to prevent accidents.

Regularly Rotating Toys

Store some toys out of sight and swap them with others after some time. This keeps playtime fresh and exciting. Rotating toys helps children focus on fewer items. It also reduces mess and teaches kids to appreciate their toys more.

Frequently Asked Questions

What Is The 20 Toy Rule?

The 20 toy rule limits children to about 20 toys at a time. It reduces clutter, boosts focus, and encourages creativity through rotation.

What Is The 10 Toy Rule?

The 10 toy rule limits children to ten toys at a time, promoting focus, creativity, and less clutter. Rotate toys regularly to keep play fresh and engaging.

Is It Normal For A 2 Year Old To Line Up Cars?

Yes, it is normal for a 2-year-old to line up cars. This behavior shows focus, organization, and developing motor skills. It often reflects early pattern recognition and imaginative play.

What Age Is The 24v Ride-on Toys For?

24V ride-on toys suit children aged 5 to 10 years. They offer suitable power and safety for this age group.

What Are The Main Differences Between Indoor And Outdoor Ride-on Toys?

Indoor ride-on toys are smaller, quieter, and safe for limited spaces. Outdoor ones are larger, more durable, and built for rough surfaces.

Which Ride-on Toys Are Safer For Young Children?

Indoor ride-on toys often have softer edges and lower speeds, making them safer for toddlers. Outdoor toys may require supervision due to rough terrain.

How Do Ride-on Toys Benefit A Child’s Development?

They improve motor skills, balance, and coordination. Both indoor and outdoor toys encourage imaginative play and physical activity.

Can Ride-on Toys Be Used Both Indoors And Outdoors?

Some ride-on toys are versatile enough for both, but most are designed specifically for one setting due to size and material.

What Materials Are Common For Outdoor Ride-on Toys?

Outdoor ride-on toys usually use sturdy plastic or metal to handle weather and rough use. Indoor toys use lighter, softer materials.

How Much Space Is Needed For Indoor Ride-on Toys?

Indoor ride-on toys need enough room to move safely without bumping furniture. Usually, a clear area of a few feet is enough.

Conclusion

Choosing between indoor and outdoor ride-on toys depends on your child’s needs and space. Indoor toys suit smaller areas and rainy days. Outdoor toys offer more room for active play and fresh air. Both types help develop coordination and creativity.

Think about safety, weather, and available space before deciding. Remember, balancing playtime inside and outside keeps children happy and healthy. Let kids enjoy the fun and learning that ride-on toys provide, wherever they are.

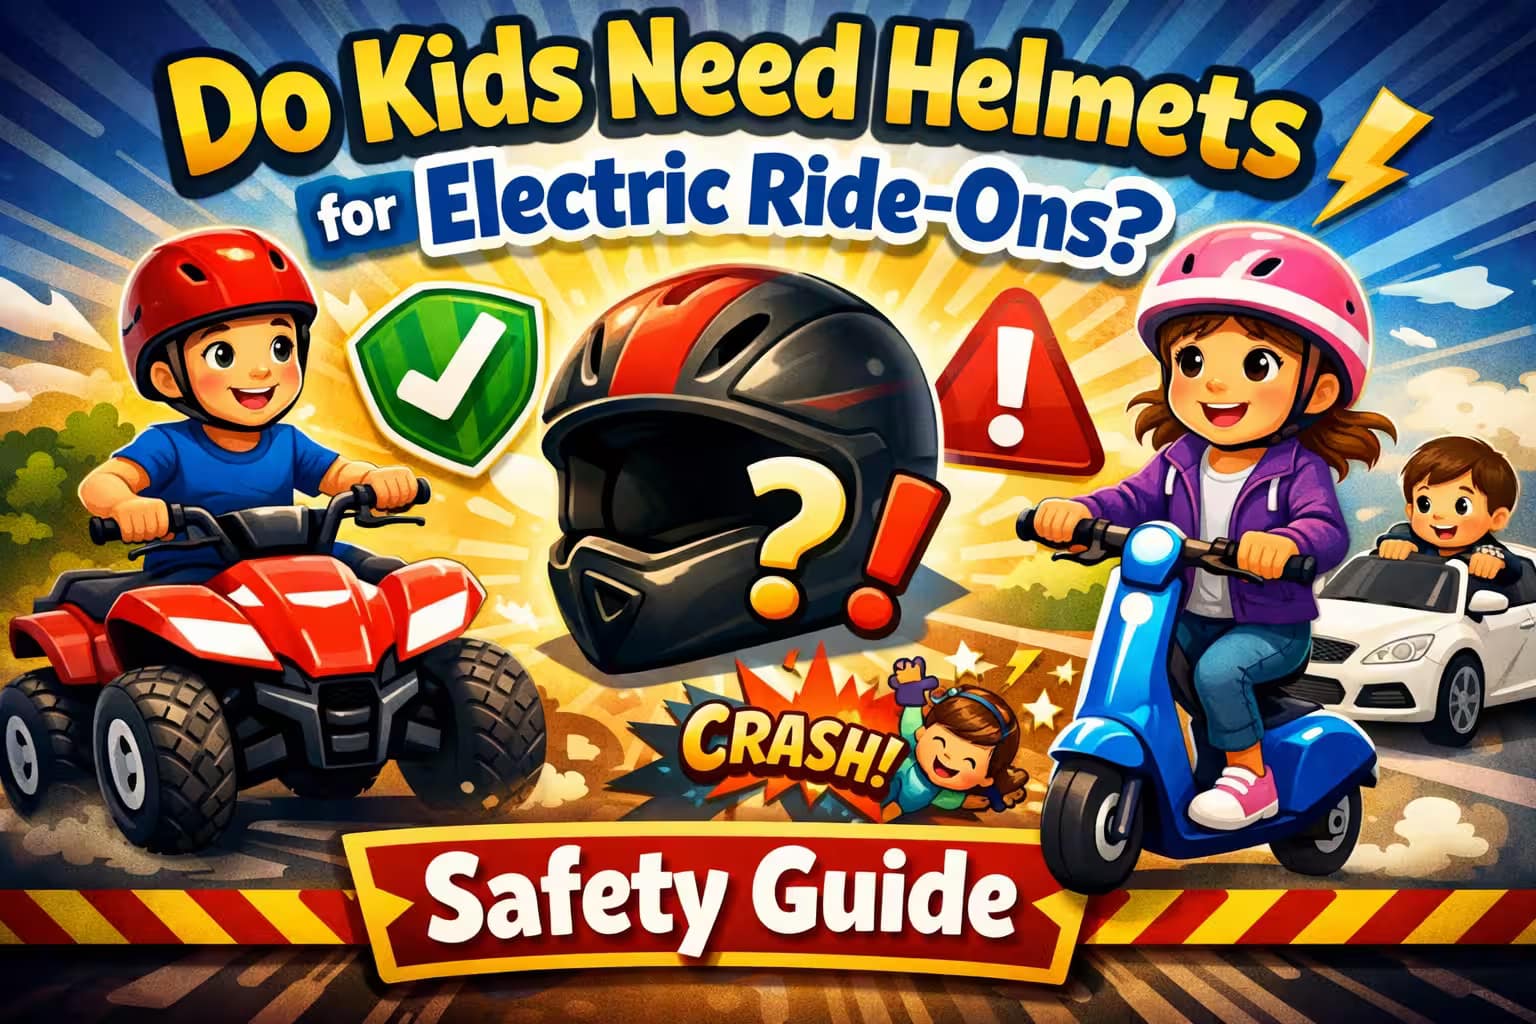
Do Kids Need Helmets for Electric Ride-Ons Safety Guide

Do Kids Need Helmets for Electric Ride-Ons? Safety Guide

Every parent wants their child to have fun, but safety is always the top priority. With electric ride-ons—like mini cars, scooters, and balance bikes—becoming popular among kids, it’s natural to ask: Do kids need helmets for electric ride-ons? The answer might seem simple at first, but as you look closer, there are many important reasons, rules, and risks that parents should know. This guide will help you understand why helmets matter, the science behind head injuries, what the law says, and how to choose the best helmet for your child.

Why Kids Love Electric Ride-ons

Children are naturally drawn to things that move. Electric ride-ons—such as battery-powered cars, mini motorcycles, scooters, and all-terrain vehicles—offer excitement and a sense of independence. For many kids, these toys are more than just a way to play; they provide a first taste of driving, speed, and coordination.

The market for electric ride-ons has grown fast. In the past five years, sales have doubled in many countries. Parents buy them as birthday or holiday gifts, and you’ll see them in parks, backyards, and even sidewalks. Some ride-ons can reach speeds of 5 to 15 miles per hour, which is much faster than the average child can run.

With this new speed comes new risks. A simple slip or collision can cause serious injuries, especially to the head. That’s why more experts are recommending helmets—not just for bikes, but for all types of electric ride-ons.

Understanding The Risks Of Electric Ride-ons

Many parents underestimate the dangers of electric ride-ons. They look like toys, so it’s easy to think they are completely safe. But the data tells a different story.

A study by the American Academy of Pediatrics shows that over 20,000 children visit emergency rooms each year due to injuries from ride-on toys, and the numbers are rising with electric models. The most common injuries are cuts, bruises, broken bones, and head injuries.

Head injuries are the most serious. Even a fall from a low height—like tipping off a mini car—can cause a concussion or skull fracture. The brain is soft and vulnerable, and children’s skulls are not fully developed. This makes kids more likely to get hurt if they hit their heads.

Non-obvious insight: Many accidents happen at low speeds or while turning, not just during fast driving. Also, injuries can occur even on flat surfaces and in familiar places like your own driveway.

What Science Says About Head Injuries

When a child falls off an electric ride-on and hits their head, the force can cause the brain to bounce inside the skull. This can lead to:

  • Concussion: Temporary loss of brain function, leading to confusion, dizziness, or memory loss.
  • Skull fracture: A break in the bone that protects the brain.
  • Brain bleed: Internal bleeding that can cause long-term damage or death.

According to the Centers for Disease Control and Prevention (CDC), helmets reduce the risk of head injury by up to 85% in bicycle accidents. While electric ride-ons are not bicycles, the speeds and risks are similar.

Non-obvious insight: Helmets also help protect the face, jaw, and teeth. Many accidents result in broken teeth or facial cuts, which a helmet with a face guard can prevent.

Are Helmets Required By Law For Electric Ride-ons?

Laws about helmet use for electric ride-ons vary by country, state, and even city. In the United States, most helmet laws were written for bicycles, not electric toys. However, some states and cities are updating their rules as these toys become more common.

For example:

  • California requires helmets for all riders under 18 on electric scooters and skateboards, which includes many ride-on toys.
  • New York City has similar rules for electric bikes and scooters.
  • In the UK and much of Europe, helmet use is strongly recommended but not always required by law.

It’s important to check the rules in your area. But even if there’s no law, experts agree: helmets should be used every time your child rides an electric ride-on.

Do Kids Need Helmets for Electric Ride-Ons? Safety Guide
Do Kids Need Helmets for Electric Ride-Ons? Safety Guide 22

Types Of Electric Ride-ons And Helmet Needs

Not all electric ride-ons are the same. Some go faster, some are closer to the ground, and some are designed for rougher surfaces. Here’s a breakdown:

Type of Ride-OnAverage Speed (mph)Helmet Needed?
Electric Cars (sit-in)2–6Yes
Electric Scooters5–15Yes
Balance Bikes5–10Yes
Mini Motorcycles/ATVs10–20Yes (full-face recommended)
Hoverboards6–12Yes

Key point: Even for slow ride-ons, a helmet is important. Tipping or sudden stops can throw a child forward, causing a head impact.

How Helmets Protect Children

Helmets are more than just hard shells. They have special design features to absorb impact and protect the brain.

  • Outer shell: Spreads out the force of the hit.
  • Foam liner: Absorbs shock and reduces the energy reaching the head.
  • Straps and fit system: Keep the helmet in place during a fall.

A helmet must fit well to work. A loose helmet can move during a crash, leaving the head exposed. A helmet that’s too tight is uncomfortable and may not get worn at all.

Choosing The Right Helmet For Electric Ride-ons

Picking a helmet is not just about buying the first one you see. Here are the key things to consider:

  • Size and Fit: Measure your child’s head with a tape measure, just above the eyebrows. Check the manufacturer’s size chart. The helmet should be snug but not painfully tight.
  • Certification: Look for helmets that meet safety standards, such as CPSC (USA), EN 1078 (Europe), or ASTM. These labels show the helmet has passed crash tests.
  • Type: For slower ride-ons, a standard bicycle helmet is fine. For faster toys or mini motorbikes, consider a full-face helmet for more protection.
  • Comfort: Padding and ventilation matter. If a helmet is hot or itchy, kids won’t want to wear it.
  • Style: Let your child help choose the color or design. If they like how it looks, they’re more likely to wear it.
  • Adjustability: Good helmets have adjustable straps and dials for a better fit as your child grows.

Practical example: Try the “wiggle test.” Put the helmet on your child, buckle it, and ask them to shake their head. The helmet should not slide around.

Common Mistakes Parents Make About Helmets

Many parents make the same mistakes, often without realizing it:

  • Thinking slow ride-ons are safe without helmets: Even a fall from a stationary toy can hurt a child’s head.
  • Buying bigger helmets to “grow into”: Loose helmets don’t protect well.
  • Assuming all helmets are equal: Some cheap helmets do not meet safety standards.
  • Letting kids ride without fastening the chin strap: An unstrapped helmet can come off during a fall.
  • Not replacing helmets after a crash: Helmets are designed for one impact. After a crash, the foam may be damaged inside even if it looks fine.

How To Teach Kids To Wear Helmets

Kids don’t always want to wear helmets, especially if their friends don’t. Here are some ways to encourage safe habits:

  • Be a role model: If you wear a helmet when biking, your child will see it as normal.
  • Start young: Make helmets a rule from the first ride.
  • Make it fun: Let kids decorate their helmets with stickers (as long as it doesn’t block vents or labels).
  • Praise and reward: Give positive attention when they remember to put on their helmet.
  • Educate: Explain, in simple words, why helmets are important. Share stories or videos about helmet safety.

Non-obvious insight: Kids are more likely to wear helmets if they feel ownership. Let them choose their own style or color.

Case Studies: Real Stories Of Helmet Use

Case 1: The Backyard Fall

Emma, age 5, was riding her electric car in the backyard at just 3 mph. She turned too fast and tipped over. She was wearing her helmet, which took most of the impact. She walked away with a small bruise, but the helmet had a large crack.

Without it, doctors said she would have needed stitches or worse.

Case 2: The Driveway Crash

Liam, age 8, loved his electric scooter. One day he lost control and hit a curb. His helmet protected his head, but he still broke his arm. The hospital staff said the helmet prevented a serious head injury.

Key takeaway: Injuries can happen at any speed, on any surface, and at any time. Helmets make a real difference.

Do Kids Need Helmets for Electric Ride-Ons? Safety Guide
Do Kids Need Helmets for Electric Ride-Ons? Safety Guide 23

Comparing Helmet Types For Electric Ride-ons

Different electric ride-ons need different helmet types. Here’s a quick comparison:

Helmet TypeBest ForProtection LevelCommon Features
Bicycle HelmetElectric cars, scooters, balance bikesGoodLightweight, ventilated, covers top and sides
Multi-Sport HelmetHoverboards, skateboards, scootersVery GoodExtra coverage for back of head
Full-Face HelmetMini motorcycles, ATVsExcellentCovers chin, jaw, face; heavier

Tip: For most electric ride-ons, a certified bicycle or multi-sport helmet is enough. For faster or off-road toys, upgrade to a full-face helmet.

Safety Features To Look For In Helmets

Not all helmets offer the same level of protection. Look for these safety features:

  • MIPS (Multi-directional Impact Protection System): Reduces rotational force during angled impacts.
  • Reflective strips: Makes your child more visible, especially in low light.
  • Adjustable fit system: Ensures the helmet stays snug as your child grows.
  • Ventilation: Prevents overheating and discomfort.
  • Chin pads: Add comfort and reduce skin irritation.

Non-obvious insight: Some helmets come with built-in lights or visors. These extras can make riding safer and more enjoyable.

What To Do After A Crash

If your child falls or crashes while wearing a helmet:

  • Check for injuries: Look for signs of concussion (confusion, vomiting, loss of balance). Get medical help if needed.
  • Inspect the helmet: Look for cracks, dents, or crushed foam. Replace the helmet if you see any damage.
  • Do not reuse a damaged helmet: Even if it looks okay, the inside foam may be broken.

Tip: Always keep a spare helmet in case one gets damaged.

Beyond Helmets: Other Safety Gear For Electric Ride-ons

While helmets are the most important, other gear can help:

  • Elbow and knee pads: Protect against scrapes and broken bones.
  • Gloves: Prevent cuts to the hands during falls.
  • Closed-toe shoes: Protect feet and toes from injury.
  • Bright clothing: Makes your child more visible to drivers and others.

Important: Teach your child to always wear shoes and never ride barefoot.

Where And When Should Kids Wear Helmets?

Kids should wear helmets anytime they ride an electric ride-on:

  • At home: Even on smooth driveways or patios.
  • In parks: Paths can be uneven, with hidden bumps or obstacles.
  • On sidewalks or streets: Cars, pets, and other riders can cause accidents.
  • During group play: Peer pressure can make kids skip helmets, but injuries are more common when kids ride together.

Non-obvious insight: Many accidents happen during short rides. Make helmet use a habit, not an exception.

How Long Should A Child’s Helmet Last?

Helmets have a lifespan, even if they never crash. Most experts recommend replacing helmets every 3–5 years due to:

  • Wear and tear: Straps, pads, and foam wear out.
  • Sun and weather: UV rays and moisture can weaken materials.
  • Growth: As kids grow, their head size changes.

If the helmet has been in a crash, replace it right away.

Do Kids Need Helmets for Electric Ride-Ons? Safety Guide
Do Kids Need Helmets for Electric Ride-Ons? Safety Guide 24

Helmet Myths Parents Should Ignore

  • Myth: “My child is careful, so they don’t need a helmet.” Accidents are not always your child’s fault.
  • Myth: “Helmets make kids overconfident.” Studies show helmets do not make children take more risks.
  • Myth: “Helmets are only for bikes.” Any moving toy with wheels can cause a head injury.
  • Myth: “Helmets are uncomfortable.” Modern helmets are lightweight and well-ventilated.

Global Helmet Recommendations

Major health organizations—including the World Health Organization (WHO) and the CDC—strongly recommend helmets for all children using electric ride-ons. Many countries are updating their safety guidelines as these toys become more common.

For more on international helmet laws and recommendations, see the CDC’s Helmet Safety page.

The Role Of Parents In Helmet Safety

Parents set the rules and lead by example. Here’s how you can help:

  • Set clear rules: No helmet, no ride.
  • Lead by example: Wear a helmet yourself when biking or skating.
  • Check fit regularly: Make sure the helmet still fits as your child grows.
  • Replace when needed: Don’t wait until a helmet is falling apart.
  • Be consistent: Enforce helmet use every time, not just for long rides.

Non-obvious insight: Children are more likely to follow safety rules if they see their parents and older siblings doing the same.

What Experts And Pediatricians Say

Pediatricians and safety experts agree: Helmets are essential for electric ride-ons. The risk of head injury is too great to ignore, and helmets are a simple, low-cost way to prevent serious harm.

Dr. Lisa Taylor, a pediatric injury specialist, says, “Parents often regret not making helmets a rule only after an accident happens. Prevention is always better than treatment. ”

Frequently Asked Questions

Is A Helmet Really Necessary For Slow Electric Cars?

Yes. Even slow ride-ons can cause falls or crashes. The height from the ground and hard surfaces like concrete or tile mean a helmet is always a smart choice.

What Age Should Kids Start Wearing Helmets?

As soon as a child starts using any ride-on toy with wheels, they should wear a helmet. This includes toddlers on balance bikes or electric cars.

How Can I Tell If A Helmet Fits Correctly?

The helmet should sit level on your child’s head, just above the eyebrows. Straps should form a “V” under the ears and be snug under the chin. The helmet should not move when the child shakes their head.

Can I Use A Hand-me-down Helmet From An Older Sibling?

Only if the helmet is not damaged, is less than five years old, and fits your child’s head perfectly. Otherwise, buy a new helmet for best safety.

What Should I Do If My Child Refuses To Wear A Helmet?

Be firm and consistent. Make helmet use a rule for riding. Let your child help pick their helmet, and explain why it’s important. Over time, most kids accept it as normal.

Electric ride-ons are a fun and modern way for children to play, but safety must always come first. Helmets protect against serious injuries, are recommended by experts worldwide, and should be as normal as buckling a seatbelt. With the right helmet, clear rules, and good habits, your child can enjoy their ride-on—and you can enjoy peace of mind.

Leave Ride on Charging Overnight Is It Safe or Harmful

Leave Ride on Charging Overnight: Is It Safe or Harmful?

Leaving your ride—whether it’s an electric car, e-bike, scooter, or even a motorcycle—on charge overnight has become a daily routine for many people. The convenience is obvious: you plug in before bed, and your vehicle is ready for a full day’s use the next morning. But is this practice safe? Does it hurt your battery or cost you more money? How do modern chargers and batteries handle overnight charging? These questions matter, especially as electric and battery-powered vehicles are becoming more common around the world. This article will clear up the confusion and provide practical advice, so you can make smart decisions about charging overnight.

Why People Leave Rides Charging Overnight

For busy people, overnight charging makes life easier. You get home, plug in, and don’t worry about your ride until morning. This habit is common for:

  • Electric car owners who need full batteries for their daily commute.
  • E-bike and e-scooter users who want to avoid running out of power mid-day.
  • Even motorcycle riders with modern lithium batteries sometimes plug in overnight.

The main reason is convenience. Most people have limited time, and overnight is often the only period when the vehicle is not in use. Charging during the day can be tricky if you are at work or running errands. Also, many public charging stations are less available or more expensive compared to home charging.

How Modern Charging Technology Works

Smart Chargers And Battery Management Systems

Modern rides use smart chargers and battery management systems (BMS) to control how power flows into the battery. These systems are built to:

  • Stop charging automatically when the battery is full.
  • Balance the cells inside the battery to prevent overcharging.
  • Monitor temperature and shut down if things get too hot.

For example, most electric cars, e-bikes, and scooters have built-in BMS that keep the battery safe overnight. Some chargers even reduce power flow as the battery nears 100% to avoid stressing the cells.

A Quick Look At Charging Curves

Charging does not happen at a constant speed. Batteries charge fast at first, then slow down as they get close to full. This is called a “charging curve. ” The last 20% can take longer, which is why plugging in overnight makes sense for a full charge by morning.

Here’s a simple comparison:

Battery Level (%)Charging SpeedTypical Time to Fill
0-80%Fast2-4 hours (varies by vehicle)
80-100%Slow1-2 hours (varies by vehicle)

The BMS slows charging near the top to protect the battery, so leaving your ride plugged in overnight often just means it finishes charging and then stops, or switches to a trickle (very slow) charge.

The Science Of Battery Health

Lithium-ion And Lead-acid: What’s Inside Most Rides

Most electric cars, e-bikes, and modern scooters use lithium-ion batteries. Some motorcycles and older vehicles use lead-acid batteries. Each type reacts differently to overnight charging.

  • Lithium-ion: These are more sensitive to overcharging, but modern BMS make them safe for overnight charging in almost all cases.
  • Lead-acid: These can be damaged by overcharging, but modern chargers usually have auto-shutoff.

Heat And Battery Wear

One real risk is heat. Charging creates heat, and heat damages batteries over time. High-quality rides and chargers have thermal protection, but cheap, old, or damaged units may not. If your battery or charger gets hot during overnight charging, that’s a warning sign.

Battery Aging

Every charge cycle (one full charge and discharge) wears out a battery a little. But leaving a battery plugged in after it’s full does not usually add many cycles, thanks to the BMS. However, keeping a battery at 100% for long periods (days or weeks, not just overnight) can shorten its life.

Risks Of Leaving Your Ride Charging Overnight

Fire Hazards

The biggest fear for many is fire. While fires are rare, they do happen—usually because of:

  • Faulty chargers
  • Damaged batteries
  • Poor-quality wiring

Most modern rides and chargers are safe if used correctly, but you should always use the charger that came with your vehicle or one recommended by the manufacturer.

Overcharging

For most modern vehicles, overcharging is not a real risk due to smart systems. However, older models, or very cheap off-brand rides, may lack good protection.

Power Surges And Outages

Sudden jumps or drops in your home’s electrical supply can harm chargers or batteries. Surge protectors can help, but they are not perfect.

Battery Swelling And Leaks

Batteries that are left on bad chargers for too long can swell, leak, or even burst. If you notice odd smells, swelling, or fluid near your battery, stop charging and get it checked.

Leave Ride on Charging Overnight: Is It Safe or Harmful?
Leave Ride on Charging Overnight: Is It Safe or Harmful? 28

Benefits Of Overnight Charging

Convenience

The main benefit is having a fully charged ride every morning. No waiting or planning your day around charging stops.

Off-peak Energy Prices

Many electricity providers offer lower rates at night. Charging overnight can save money if you’re on a time-of-use plan. Check your electricity bill or provider’s website for details.

Maximizing Range

Plugging in overnight means you always start with the most range possible. This is especially useful if you have a long commute or might need to drive further than usual.

Best Practices For Safe Overnight Charging

To get the benefits and avoid problems, follow these tips:

  • Use the original charger or one approved for your vehicle.
  • Plug in on a flat, hard surface—never on beds, sofas, or carpets, which can trap heat.
  • Check the battery and charger for damage before plugging in.
  • Keep the area around your charger clear to allow airflow.
  • Avoid charging outdoors in wet weather unless your charger is rated for it.
  • Don’t use extension cords unless they are heavy-duty and rated for your charger’s power.
  • Unplug if you notice strange smells, sounds, or heat.

Many people miss the importance of airflow. Storing your ride in a small, closed room or covering it with a blanket can trap heat and raise fire risk.

Leave Ride on Charging Overnight: Is It Safe or Harmful?
Leave Ride on Charging Overnight: Is It Safe or Harmful? 29

Comparing Different Rides: Overnight Charging Impact

Not all rides are the same when it comes to charging overnight. Here’s how they compare:

Type of RideTypical BatteryOvernight Charging SafetySpecial Notes
Electric CarLithium-ionVery Safe (with BMS)Some cars allow charging limits to 80% to extend life
E-BikeLithium-ionSafe (with good charger)Battery should not be left at 100% for weeks
E-ScooterLithium-ionSafe (with branded charger)Cheap models may lack protection
MotorcycleLead-acid or Lithium-ionSafe (modern chargers)Lead-acid needs careful charging

Common Myths About Overnight Charging

Myth 1: Leaving A Ride Charging Overnight Destroys The Battery

This is not true for modern rides with BMS. Occasional overnight charging is safe. Problems usually come from old, cheap, or damaged equipment.

Myth 2: It’s A Fire Hazard Every Time

While fires make headlines, they are rare. Most fires happen with off-brand, faulty, or modified chargers—not certified equipment.

Myth 3: The Battery Will “forget” How To Hold A Charge

Modern lithium-ion batteries do not have a “memory effect. ” They do not lose capacity from being charged overnight.

Myth 4: It Wastes Electricity

Most smart chargers stop drawing power when the battery is full. The extra cost is tiny—often less than a few cents.

Myth 5: All Rides Are The Same

Some e-bikes and cheap scooters lack proper protection. Always check your model’s safety features.

Leave Ride on Charging Overnight: Is It Safe or Harmful?
Leave Ride on Charging Overnight: Is It Safe or Harmful? 30

Real-world Examples

Electric Cars

Tesla, Nissan Leaf, and other major brands encourage overnight charging. Tesla’s own advice is to charge to around 80-90% for daily use and only go to 100% before long trips.

E-bikes

Many e-bike owners leave their bikes charging overnight. Problems usually happen if the charger is not matched to the battery or if the bike is stored in a very hot or cold place.

Scooters

Popular scooters like Xiaomi and Segway have BMS and smart chargers. Still, some budget scooters bought online may skip these protections.

Motorcycles

Modern motorcycles with lithium batteries and smart chargers are safe to charge overnight, but classic bikes with old lead-acid batteries need more care.

What Experts And Research Say

Studies show that smart charging and BMS have greatly reduced risks. According to the U.S. National Fire Protection Association, most fires come from “off-brand, mismatched, or damaged chargers and batteries” rather than overnight charging itself.

Major car brands, e-bike makers, and fire safety organizations agree: overnight charging is safe if you use good equipment and follow instructions. For more, see the NFPA’s lithium-ion battery safety guidelines.

How To Set Up A Safe Charging Area

A good charging spot makes a difference:

  • Choose a dry, cool, and well-ventilated area.
  • Keep the charger off the ground if possible.
  • Keep away from flammable materials.
  • Install a smoke detector nearby, especially if charging inside.
  • Use a surge protector if you live in an area with unstable power.

It’s also smart to set reminders to check on your ride occasionally—don’t just plug it in and forget about it for days.

How Charging Habits Affect Battery Life

Battery life is measured in charge cycles. One cycle means using all the battery’s energy, then recharging it. Charging overnight does not usually use extra cycles, since the charger stops when full. However, two habits can shorten battery life:

  • Always charging to 100%: Keeping lithium batteries at 80-90% for daily use is better.
  • Leaving at 0% or 100% for long periods: Store batteries around 50% if not used for weeks.

Some vehicles let you set a charging limit, so you don’t always top up to 100%. This small step can add years to your battery’s life.

Cost Of Charging Overnight

How much does it cost to charge overnight? Let’s look at some typical numbers.

Type of RideBattery Size (kWh)Cost to Charge (USD)*Charge Time (hours)
Electric Car40$4-$86-10
E-Bike0.5$0.05-$0.103-6
E-Scooter0.4$0.04-$0.093-5
Motorcycle1-2$0.10-$0.304-8

*Based on average U. S. electricity rates as of 2024. Your cost may vary by location.

Most people find the cost is low, especially for e-bikes and scooters. Charging overnight during off-peak hours can save even more.

What To Do If You Can’t Charge Overnight

Not everyone can charge at home. Here’s how to manage:

  • Look for public charging stations near your work or shopping areas.
  • For e-bikes and scooters, carry a spare battery if possible.
  • Use fast chargers when you need a quick top-up.
  • Plan your trips to avoid running out of battery.

Some workplaces offer charging stations. Ask your employer if this is an option.

Environmental Impact Of Overnight Charging

Charging overnight has a small impact on the environment, mainly from the source of your electricity. If your local grid uses renewable energy (like wind or solar), the impact is lower. Charging during off-peak hours can also help the grid use energy more efficiently, which is better for the planet.

Extra Tips Most Beginners Miss

  • Update your charger’s firmware if your vehicle or charger allows it. Some smart chargers get safety and efficiency updates over time.
  • Check for recalls on your charger or battery. Manufacturers sometimes find issues and offer replacements.
  • If your ride is not used for a long time, disconnect the battery or use “storage mode” if available.
  • Read the manual. Many users skip this, but it often includes important charging advice specific to your ride.

When Not To Charge Overnight

There are situations where overnight charging is not a good idea:

  • If your charger or battery is damaged or old.
  • If you use a non-approved charger.
  • If you charge in a very hot or humid place.
  • If your home wiring is known to be unsafe or outdated.

In these cases, charge during the day when you can check on your ride, or fix the problem before charging.

Frequently Asked Questions

Is It Safe To Leave My Ride Charging Overnight Every Day?

Yes, if you use a smart charger and battery management system, and follow safety guidelines. Modern rides are designed for this.

Will Charging Overnight Increase My Electricity Bill A Lot?

No. Charging an e-bike or scooter overnight costs just a few cents. Electric cars cost more, but overnight charging often uses cheaper, off-peak electricity.

Can Overnight Charging Cause A Fire?

Fires are very rare with modern, certified equipment. Most risks come from damaged or non-approved chargers. Always check your gear for damage and keep the charging area clear.

Does Overnight Charging Damage The Battery?

Occasional overnight charging does not harm modern lithium-ion batteries. For best battery life, avoid always charging to 100% and unplug if not needed.

What Should I Do If My Charger Or Battery Gets Hot During Overnight Charging?

Unplug immediately and let things cool down. Check for damage and replace faulty parts. If you see smoke, swelling, or smell burning, do not use the charger or battery again.

Leaving your ride on charging overnight is a useful and safe habit for most people, as long as you use good equipment and follow simple safety tips. With modern technology, you can enjoy a full battery every morning without worry. Always stay aware, and your ride will serve you well for years to come. For more detailed safety guidelines, check out the NFPA’s lithium-ion battery safety tips.

How to Increase Ride-On Speed Safely Expert Tips and Tricks

How to Increase Ride-On Speed Safely: Expert Tips and Tricks

Riding a ride-on vehicle can be thrilling, especially for kids and hobbyists. Whether it’s a battery-powered car, an electric scooter, or a modified go-kart, the excitement often grows with speed. But boosting speed safely is not just about swapping parts—it’s about making smart choices to protect the rider and the vehicle.

Many people make the mistake of focusing only on speed, forgetting about safety, durability, and control. If you want to increase ride-on speed, you must balance performance with security. This article will guide you through practical steps, technical upgrades, and essential safety checks, helping you enjoy faster rides without unnecessary risks.

Understanding Ride-on Speed Basics

Before changing anything, it’s important to know how ride-ons generate speed. Most ride-on vehicles, like electric cars and scooters, use an electric motor powered by a battery. The motor turns the wheels, and the speed depends on the motor’s power, the battery’s voltage, and the weight it carries. For gas-powered ride-ons, speed comes from engine power, fuel quality, and transmission efficiency.

Manufacturers design ride-ons with a safe speed limit for their target users (often children). These limits consider the frame strength, wheel quality, and braking system. Pushing beyond these limits without adjustments can cause breakdowns or accidents.

Key Factors Affecting Speed

  • Motor Power (measured in watts or horsepower): Higher power usually means more speed.
  • Battery Voltage: Higher voltage delivers more energy to the motor.
  • Gear Ratio: Changing gears can affect acceleration and top speed.
  • Weight Load: Heavier loads slow down the ride-on.
  • Wheel Size and Type: Larger or smoother wheels reduce friction.
  • Aerodynamics: Shape and wind resistance can limit speed.
  • Surface Condition: Grass, gravel, or rough ground slows vehicles.

Knowing these basics helps you make safe upgrades instead of random changes.

Assessing Your Ride-on: Is It Ready For More Speed?

Not every ride-on is built for upgrades. Some models have weak frames or basic electronics that can’t handle extra power. Before making changes, check if your ride-on can safely go faster.

Safety Inspection Checklist

  • Frame Strength: Look for cracks, rust, or weak welds.
  • Braking System: Test if the brakes stop the vehicle quickly from top speed.
  • Tires and Wheels: Check for wear, cracks, or loose parts.
  • Electrical Wiring: Inspect for burnt or thin wires (for electric ride-ons).
  • Steering and Suspension: Turn the wheel and bounce the ride-on—does it feel tight or wobbly?

If any area fails inspection, fix it before increasing speed. Skipping this step is a common mistake. Many beginners focus on motors and batteries but ignore the basics, risking sudden failures.

How to Increase Ride-On Speed Safely: Expert Tips and Tricks
How to Increase Ride-On Speed Safely: Expert Tips and Tricks 34

Upgrading Safely: Step-by-step Guide

Speed upgrades should follow a logical order. Don’t start with the biggest changes; instead, build a foundation for safe speed.

1. Improve The Battery

For electric ride-ons, battery upgrades are the simplest way to increase speed. Most standard models use a 6V or 12V battery. Upgrading to a higher voltage (like 18V or 24V) gives the motor more power.

  • Choose the Right Battery Type: Lithium-ion batteries are lighter and store more energy than lead-acid batteries.
  • Check Compatibility: Make sure your motor and controller can handle the new voltage.
  • Install Proper Connectors: Use wires and connectors rated for the new power level.

Non-obvious insight: Doubling the voltage without changing the motor controller can burn out electronics or melt wires. Always check the maximum voltage rating on your ride-on’s components.

2. Upgrade The Motor

A more powerful motor can handle higher speeds and heavier loads. Look for motors with higher wattage or horsepower.

  • Match the Motor to Battery Voltage: For example, a 24V motor is best with a 24V battery.
  • Buy Quality Brands: Cheap motors overheat or fail quickly.
  • Ensure Proper Mounting: Strong mounts prevent vibration and misalignment.

Tip: Some motors have built-in thermal protection, which cuts power before overheating. This feature is worth the extra cost for safety.

3. Adjust Gear Ratio

The gear ratio determines how much the motor turns compared to the wheels. A lower gear ratio (fewer teeth on the motor gear, more on the wheel gear) increases acceleration but lowers top speed. A higher ratio does the opposite.

  • Swap Gears Carefully: Many ride-ons let you change pinion (motor) or spur (wheel) gears.
  • Test Incrementally: Make small changes, then test speed and control.

Hidden danger: Extreme gear changes can make the ride-on hard to control or damage the drivetrain.

4. Upgrade The Wheels

Wheels affect both speed and safety. Bigger wheels cover more ground per turn, increasing top speed. Smoother wheels reduce friction.

  • Choose Quality Rubber or Foam: Cheap plastic wheels wear out fast and lose grip.
  • Check Fit: Ensure the new wheels don’t rub against the frame or body.

Expert note: Oversized wheels can strain the motor and battery. Balance wheel size with motor power.

5. Lighten The Load

Reducing weight is a free way to boost speed. Remove unnecessary accessories, heavy decorations, or unused seats.

  • Empty Storage Bins
  • Use Lightweight Materials for any replacements or repairs

Surprising fact: Even small weight reductions can noticeably improve acceleration and top speed.

6. Upgrade The Controller

The motor controller regulates how much power reaches the motor. Standard controllers may limit speed for safety. Upgrading to a programmable controller unlocks more power.

  • Choose a Controller with Adjustable Limits
  • Install According to Instructions—incorrect wiring can cause fires.

Pro tip: Set a maximum speed limit for younger or less experienced riders, even with a more powerful controller.

7. Improve Aerodynamics

Less air resistance means higher speed. Simple changes can help:

  • Smooth Surfaces: Remove rough or loose decorations.
  • Add Wind Deflectors: Small plastic shields can reduce drag.
  • Lower the Profile: Lower seats or frames reduce the area facing the wind.

Most beginners ignore aerodynamics, but it can make a significant difference at higher speeds.

Essential Safety Upgrades

Speed means nothing without safety. As you increase ride-on speed, upgrade these parts to keep riders safe.

Braking Systems

The stock brakes may be enough for low speeds but can fail at higher ones.

  • Upgrade to Disc Brakes if possible (for large ride-ons)
  • Check Brake Pads often for wear
  • Adjust Brake Cables for quick response

Tires

Faster speeds require better grip.

  • Use Non-Slip Tires
  • Choose Larger, Wider Tires for more contact with the ground

Steering And Suspension

High speed amplifies small steering problems.

  • Tighten Steering Linkages
  • Upgrade Bushings to metal or high-quality plastic
  • Install Shock Absorbers for smoother rides on rough surfaces

Protective Features

  • Add Seat Belts for children’s ride-ons
  • Install a Roll Cage for go-karts or off-road models
  • Use Padded Seats to reduce injury risk

Safety Gear

No speed increase is safe without proper gear:

  • Helmets (always)
  • Knee and Elbow Pads
  • Closed-Toe Shoes
  • Gloves for better grip

Even skilled riders can fall or crash, especially during testing.

Testing And Tuning: How To Find The Right Balance

Every ride-on responds differently to upgrades. Testing is essential to avoid surprises.

Step-by-step Testing

  • Test After Each Upgrade: Don’t combine all changes at once.
  • Use a Measured Area: Mark a test track with known distances.
  • Record Speed: Use a GPS app or speedometer.
  • Check Braking Distance: Make sure stopping power matches speed.
  • Listen for Strange Noises: Clicking, grinding, or electrical smells are warning signs.

Fine-tuning

  • Adjust Gear Ratios for more speed or better acceleration based on test results.
  • Tweak Controller Settings if using a programmable model.
  • Balance Weight by adjusting seat position or battery location.

Keep A Maintenance Log

Write down changes and test results. This helps track what works and what causes problems.

Common mistake: Skipping test runs and going straight to full-speed use can lead to accidents or breakdowns.

Comparing Speed Upgrades: What Works Best?

Different upgrades give different results. Here’s a side-by-side look at how common changes affect speed, cost, and safety:

Upgrade TypeSpeed GainCostSafety ImpactComplexity
Battery VoltageHigh$$Medium RiskMedium
Motor SwapVery High$$$High RiskHigh
Gear RatioMedium$Low RiskMedium
Wheel UpgradeLow-Medium$$Low RiskLow
Weight ReductionLow$No RiskLow
Controller UpgradeMedium-High$$Medium RiskHigh

Tip: Start with low-risk, low-cost upgrades before moving to more complex changes.

Real-world Example: Safe Speed Upgrade For A Kids’ Ride-on Car

Let’s walk through a practical upgrade for a 12V kids’ electric car.

  • Initial Speed: About 5 mph (8 km/h)
  • Battery Upgrade: Swap 12V lead-acid for 18V lithium-ion. Speed increases to about 7 mph (11 km/h).
  • Motor Upgrade: Replace with a higher wattage 18V motor. Speed jumps to 9 mph (14 km/h).
  • Gear Ratio Change: Adjust for higher top speed. Now reaches 11 mph (17 km/h).
  • Wheel Swap: Install rubber tires for better grip and less slip.
  • Safety Check: Upgrade brakes, add seat belt, test in an open area.

Result: The car is faster, stops safely, and handles well. The child wears a helmet and uses the ride-on only under supervision.

Lesson: Every speed increase requires a matching safety improvement.

Common Mistakes And How To Avoid Them

Many people make errors when trying to increase ride-on speed. Avoid these traps to keep your project safe and successful.

  • Ignoring Safety Upgrades: Never upgrade speed without improving brakes and tires.
  • Overloading the Battery or Motor: Too much voltage or power can fry electronics or cause fires.
  • Skipping Testing: Always test each change before moving on.
  • Using Cheap Parts: Low-quality motors, wheels, or batteries may fail unexpectedly.
  • Not Supervising Young Riders: Speed increases make ride-ons harder to control, especially for kids.
  • Not Reading the Manual: Many ride-ons have specific upgrade warnings or tips—always check.
  • Poor Wiring: Sloppy electrical work is a fire hazard. Use correct wire gauges and connectors.

Non-obvious insight: Upgrading one part often stresses other components. For example, a faster motor may expose weak spots in the drivetrain or frame. Inspect all parts regularly.

Legal And Warranty Considerations

Increasing ride-on speed may affect the warranty or local laws. Some areas have rules for electric vehicles, especially for children.

  • Check Warranty Terms: Modifying electronics or motors often voids the warranty.
  • Know Local Laws: Some cities limit ride-on use to private property or set speed caps.
  • Insurance: For high-value or large ride-ons, check if upgrades affect coverage.

Responsible tip: Keep original parts. If you need to return or sell the ride-on, you may need to restore it to factory settings.

When To Call A Professional

Not all upgrades are DIY-friendly. Consider hiring an expert if:

  • You’re Upgrading High-Voltage Batteries: Mistakes can be dangerous.
  • Major Electrical Rewiring is Needed
  • You Need Welding or Frame Reinforcement
  • You’re Not Confident in Mechanical Work

A professional can ensure upgrades are safe and reliable, especially for high-speed or expensive ride-ons.

Comparing Ride-on Types: Which Are Safest To Upgrade?

Some ride-ons are better for speed upgrades than others. Here’s a comparison:

Ride-On TypeUpgrade PotentialSafety NeedsIdeal for
Kids’ Electric CarsLow-MediumHigh (child safety)Supervised Play
Electric ScootersMediumMedium (brakes, helmet)Teens/Adults
Go-KartsHighVery High (roll cage, seat belt)Older Kids/Adults
HoverboardsLowMedium (balance, speed)Teens
ATVsHighVery High (gear, terrain)Experienced Riders

Best advice: Upgrade only those ride-ons with sturdy frames, good brakes, and proper safety features.

Maintenance After Speed Upgrades

More speed means more wear and tear. Maintenance becomes even more important.

  • Check All Bolts and Nuts weekly
  • Inspect Brakes before each ride
  • Monitor Battery Health for swelling or overheating
  • Lubricate Moving Parts (chains, gears, axles)
  • Test Electronics for loose wires or burnt smells
  • Replace Worn Tires before they become dangerous

A well-maintained ride-on lasts longer and stays safer, even at higher speeds.

How to Increase Ride-On Speed Safely: Expert Tips and Tricks
How to Increase Ride-On Speed Safely: Expert Tips and Tricks 35

Advanced Tips For Enthusiasts

If you’re experienced and want to push the limits safely, consider:

  • Custom Fabrication: Reinforce the frame with metal brackets or welds.
  • Performance Electronics: Use programmable controllers with soft-start features to avoid wheel spin.
  • Telemetry: Install a speed sensor and data logger to monitor performance and catch problems early.
  • Professional Tuning: Have a specialist balance gear ratios and motor timing for best results.

Warning: Advanced upgrades can make the ride-on dangerous for beginners. Always label modified ride-ons and restrict use to skilled riders.

Where To Find Reliable Parts And Help

Use trusted sources for parts and advice. Avoid unknown brands or sellers with poor reviews.

  • Official Manufacturer Websites
  • Specialty Hobby Shops
  • Online Forums and Community Groups for your ride-on model
  • Professional Repair Shops

For example, you can learn more about battery technology and safety from the Wikipedia: Lithium-ion battery page.

The Right Mindset: Speed With Responsibility

Upgrading a ride-on for more speed is exciting, but remember your goal is safe fun—not just breaking records. Every change should improve the experience without making the ride dangerous. Take your time, test carefully, and never cut corners on safety.

With the right approach, you can enjoy faster rides and keep everyone safe.

Frequently Asked Questions

How Fast Can A Ride-on Go After Upgrades?

Most standard ride-ons reach 5–6 mph (8–10 km/h). With careful upgrades, speeds of 10–15 mph (16–24 km/h) are possible for kids’ cars, and even higher for adult go-karts or scooters. Always consider safety and rider skill before pushing limits.

Is It Safe To Increase Ride-on Speed For Children?

It can be safe with proper upgrades—especially brakes, tires, and safety gear. Always supervise children, set speed limits, and test the ride-on carefully before regular use.

Will Upgrading The Battery Alone Make My Ride-on Much Faster?

A higher-voltage battery can increase speed, but only if the motor and controller can handle it. If not, you risk damaging the electronics or causing a fire. Always check compatibility first.

Can I Return A Ride-on After Upgrading It?

Most manufacturers void the warranty if you modify the ride-on. It’s best to keep all original parts and be ready to restore the ride-on to factory condition if needed.

What’s The Biggest Mistake People Make When Upgrading For Speed?

The most common mistake is ignoring safety. Never upgrade speed without matching improvements to brakes, tires, and protective gear. Testing each upgrade before use is crucial to avoid accidents.

By following these steps and tips, you can increase ride-on speed safely and enjoy the thrill with peace of mind.

How to Increase Ride-On Speed Safely: Expert Tips and Tricks
How to Increase Ride-On Speed Safely: Expert Tips and Tricks 36
Best Realistic Ride On Construction Vehicle 2026 for Kids’ Playtime Fun

Best Realistic Ride On Construction Vehicle 2026 for Kids’ Playtime Fun

Imagine trying to keep your energetic child entertained on a busy weekend afternoon while juggling household tasks. Finding a toy that captures their imagination without constant supervision can feel like an impossible challenge.

Ride on construction vehicles offer a fun, engaging way to spark creativity and keep kids active, giving parents a much-needed break. In the following sections, you’ll discover expert picks to help you choose the best realistic ride on construction vehicle for 2026.

Expert Picks For Best Realistic Ride On Construction Vehicle 2026

Cat Excavator Push Car

The Best Realistic Ride On Construction Vehicle 2026 choice for toddlers looking for an authentic construction play experience with a licensed CAT design and functional features.

The CAT Excavator Push Car by Best Ride On Cars is a small, toddler-friendly ride-on toy that mimics the look and feel of a real construction vehicle. Featuring an officially licensed Caterpillar design, it offers a rotating front bucket for imaginative digging play, an interactive steering wheel with music and horn sounds, and convenient under-seat storage. This ride-on digger is designed to bring an authentic construction vehicle experience to young children, encouraging active and creative play.

In everyday use, this push car stands out for its sturdy backrest and comfortable seating, supporting toddlers during longer play sessions. The functional bucket and interactive elements keep kids engaged without overwhelming them, making it a reliable and easy-to-use option for parents seeking a safe and durable ride-on toy. Its compact size and lightweight design make it easy to move around both indoors and outdoors.

Pros:

  • Authentic licensed CAT design enhances realistic play
  • Functional front bucket promotes imaginative digging
  • Under-seat storage for carrying toys and treasures
  • Interactive steering wheel with music and horn sounds
  • Sturdy backrest for extended comfort during play
  • Compact and lightweight for easy handling

Cons:

  • Limited to push power; no motorized features
  • Best suited for smaller toddlers due to size

Who This Is Best For

This ride-on excavator is ideal for toddlers and young children who enjoy construction-themed toys and active play. It’s easy to assemble and use right out of the box, making it a good fit for parents looking for a straightforward, durable toy without complicated features. Beginners will appreciate the simple mechanics and sturdy build, while the realistic design adds extra appeal for kids fascinated by construction vehicles.

Keep in mind to supervise younger toddlers during use, especially when playing outdoors. The under-seat storage adds convenience for carrying small items, making cleanup and play transitions smoother. Personally, I found the engaging steering wheel sounds and functional bucket to be great for keeping a child entertained over longer periods.

Best for Why
Toddlers interested in construction vehicles Authentic CAT design and functional digging bucket
Parents seeking easy-to-use ride-on toys Simple push car mechanics with added features for engagement
Indoor and outdoor play Compact size and lightweight design for versatile use

Costzon Ride On Excavator Toy

Discover the Best Realistic Ride On Construction Vehicle 2026 for imaginative kids who love construction play.

The Costzon Ride On Excavator Toy offers a versatile construction play experience for young children. Designed as a 3-in-1 toy, it can be used as a ride-on excavator, a push car, or a sliding car, allowing kids to enjoy different types of fun while improving their motor skills and balance. With realistic sounds, an adjustable bucket, and included accessories like a safety helmet and toy stones, this toy brings imaginative construction play to life.

In everyday use, this ride-on toy performs reliably thanks to its sturdy build and anti-rollover design. The ergonomic seat and functional steering wheel make it comfortable and easy for toddlers to ride, while the four anti-slip wheels work well on various surfaces such as cement, asphalt, and wooden floors. Parents can appreciate the under-seat storage for keeping small items handy, and the toy’s certifications provide added peace of mind.

Pros:

  • 3-in-1 design offers multiple ways to play
  • Adjustable bucket with realistic control levers
  • Includes safety helmet and toy stones for added fun
  • Durable, burr-free surface with anti-rollover safety
  • Ergonomic seat and functional steering wheel
  • Suitable for indoor and outdoor use on various surfaces
  • Realistic construction sounds with volume control

Cons:

  • May be too small for older or larger children
  • No battery-powered movement; fully manual operation
  • Limited color options (only yellow available)

My Recommendation

This ride-on excavator is ideal for toddlers and young kids who enjoy active, imaginative play focused on construction themes. It’s easy to assemble and offers a safe, comfortable ride with simple controls that even beginners can handle. The included helmet adds an extra layer of safety, which I appreciate when kids are so active.

If you’re looking for a toy that can grow with your child’s play style—offering different modes and encouraging balance and coordination—this is a solid choice. Just keep in mind it’s best suited for younger children due to its size. Personally, I like how it combines fun and learning in a way that feels natural and engaging.

Best for Why
Toddlers and young children Designed for kids 3 years and older with safe, ergonomic features
Parents seeking versatile toys 3-in-1 design offers multiple play options in one toy
Indoor and outdoor play Durable wheels and construction suit various surfaces
Kids interested in construction themes Realistic sounds and adjustable bucket enhance imaginative play

Anpabo Ride On Dump Truck

The ANPABO Ride On Dump Truck stands out as the Best Realistic Ride On Construction Vehicle 2026, offering an engaging and interactive play experience with its electric dump bed and remote control features.

This ride-on dump truck by ANPABO is designed for kids who love construction vehicles. It features an automatic lifting and dumping bed along with an extra shovel, allowing kids to imitate real construction tasks like carrying sand or leaves. The truck supports both manual driving and remote control modes, giving parents the ability to control the speed and direction while interacting with their children.

In everyday use, this electric vehicle delivers smooth and safe driving with its soft start, safety belt, lockable doors, and spring suspension. It performs well on various surfaces including asphalt, grass, and gravel, making it versatile for outdoor play. The built-in music player and realistic sounds add to the immersive experience, making it enjoyable and reliable for regular use.

Pros:

  • Automatic lifting dump bed and extra shovel for interactive play
  • Two driving modes with adjustable speeds for kids and parents
  • Multiple safety features including safety belt and lockable doors
  • Powerful dual motors and durable large wheels suitable for various terrains
  • Realistic design with key start, horn, headlights, and music player
  • Supports phone connection for playing favorite music
  • Easy to control remotely, enhancing parent-child interaction

Cons:

  • Relatively heavy at 55 pounds, which may affect portability
  • Limited to children who can comfortably fit within the size dimensions

My Practical Opinion

This ride-on dump truck is ideal for young kids fascinated by construction vehicles and outdoor play. It is beginner-friendly with safety features that provide peace of mind for parents. The remote control mode is a practical addition, enabling parents to supervise or join in on the fun easily. After unboxing, setting it up is straightforward, and the interactive dump bed adds a unique play element that keeps kids engaged longer.

Safety is clearly a priority here, with soft start technology and secure seating. I’d recommend this for families looking for a durable and versatile ride-on toy that balances fun with practicality. It’s a solid choice for both playtime and learning coordination skills in a safe environment.

Best for Why
Parents wanting interactive control Remote control mode allows flexible supervision and fun
Kids who enjoy realistic construction play Automatic dump bed and shovel provide authentic experiences
Outdoor play on varied terrains Durable wheels and powerful motors work on grass, gravel, and asphalt
Gift buyers for birthdays or holidays Unique features and realistic design make it a memorable present

Kid Trax 12v Cat Backhoe Loader

The Best Realistic Ride On Construction Vehicle 2026 for young kids who love hands-on play and construction fun.

The Kid Trax 12V CAT Backhoe Loader is an electric ride-on toy designed for children ages 3-6 who enjoy construction-themed play. It features realistic sounds, a working loader and digger, and a built-in speaker for music, offering a fun and engaging experience that encourages imaginative outdoor and indoor play. Its sturdy build supports up to 66 pounds, making it suitable for toddlers and young kids ready to explore their own construction adventures.

In everyday use, this ride-on excavator is easy and safe to operate thanks to its intuitive foot switch and forward/reverse controls. The speed range of 2.5-5 mph provides a smooth and manageable pace for young drivers. Its four-wheel design ensures stability on various terrains, while the rechargeable 12V battery offers several hours of continuous playtime. Parents can appreciate the combination of durability and realistic features that keep kids entertained reliably.

Pros:

  • Realistic loader and digger functions with sound effects
  • Simple controls tailored for young children
  • Supports children up to 66 lbs for longer usability
  • Four-wheel design offers good stability indoors and outdoors
  • Built-in speaker for music playback enhances fun
  • Rechargeable battery with charger included
  • Large size fits toddlers comfortably

Cons:

  • Speed limited to 5 mph, may not satisfy older kids
  • Relatively heavy for smaller toddlers to move off by themselves
  • No advanced safety features like seat belts

My Practical Opinion

This ride-on excavator is ideal for parents seeking a realistic construction toy that is both safe and entertaining for younger children. Its ease of use means kids can start playing right away with minimal supervision. While it’s best suited for beginners, the sturdy build ensures it will last through the toddler years into early childhood. I’d recommend pairing it with outdoor playtime to maximize fun and encourage physical activity. One thing to keep in mind is supervising younger toddlers to ensure safe operation, but overall it brings a lot of joy without much hassle.

For families wanting a dependable and engaging ride-on, this model strikes a nice balance between realism, durability, and ease of use.

Best for Why
Toddlers ages 3-6 Designed controls and speed suitable for young beginners
Parents wanting realistic construction play Functional loader/digger and sound effects add authenticity
Indoor and outdoor use Stable four-wheel design works well on different surfaces
Kids up to 66 lbs Sturdy build supports growing children for extended use

First Ride On Jcb 12v Excavator Toy

Discover the Best Realistic Ride On Construction Vehicle 2026 with this versatile and authentic kids’ electric excavator that combines fun and learning in one sturdy package.

This ride on excavator toy offers a realistic construction experience by blending an excavator, bulldozer, and backhoe into one engaging vehicle for kids aged 3 to 6. It’s designed with official JCB 3CX detailing and features a reversible seat, remote control, and working levers for authentic play, making it a great choice for youngsters fascinated by big machines.

In everyday use, the toy delivers solid performance thanks to its powerful 12V motors and stable design with anti-tip wheels and suspension. It’s easy to operate either independently or with parental remote control, providing smooth rides on various outdoor surfaces like grass and sand, and ensuring hours of consistent fun without hassle.

Pros:

  • Officially licensed JCB 3CX design for authenticity
  • 3-in-1 functionality: excavator, bulldozer, backhoe
  • Reversible seat and dual control modes including remote control
  • Powerful 12V battery with durable dual motors
  • Stable with anti-tip wheel and rear suspension
  • Adjustable safety features including 3-point harness
  • Suitable for multiple outdoor terrains

Cons:

  • Relatively heavy at over 50 pounds, may require adult assistance
  • Larger size may limit indoor use

My Practical Opinion

This ride on excavator is well suited for young children who are eager to explore construction play with a realistic and multifunctional vehicle. It’s especially helpful for parents who want to supervise or assist easily using the remote control feature. While the size and weight mean it’s best for outdoor use, its sturdy build makes it a reliable toy for lasting enjoyment.

Setting up is straightforward, and the safety features provide peace of mind during playtime. If you’re looking for a gift that combines educational value with active fun, this construction vehicle fits the bill without overwhelming complexity.

Overall, it’s a solid pick for kids ready to engage their imagination with hands-on, creative driving experiences.

Best for Why
Young kids aged 3–6 Designed with safety features and easy controls for early learners
Parents wanting remote supervision Includes 2.4G remote control with multiple speed settings
Outdoor play enthusiasts Stable design and high-traction wheels for varied terrains
Children interested in construction vehicles Official JCB design and multifunctional digging tools

Aosom Kids Ride On Excavator

The Aosom Kids Ride On Excavator stands out as the Best Realistic Ride On Construction Vehicle 2026, offering a hands-on digging experience that mirrors real construction vehicles for young children.

This pedal-powered ride-on excavator by Aosom offers a realistic design with fully controllable digging bucket and movable arms, perfect for kids and toddlers aged 3 and up. The construction truck includes a working horn, steering wheel, and requires no batteries or power, making it an engaging outdoor toy that encourages imaginative play.

In everyday use, it performs reliably as a sturdy pedal vehicle with smooth forward and backward movement. Its plastic construction is safe for regular use, and the steering is responsive, helping children develop coordination and motor skills while having fun. The simplicity of operation makes it easy for both beginners and more experienced young riders to enjoy.

Pros:

  • Realistic digging bucket with flexible arms and joints
  • Pedal-powered with no need for batteries or charging
  • Fully functional steering wheel for easy maneuvering
  • Durable and child-safe plastic material
  • Includes a natural working horn for added play value
  • Supports up to 77 lbs, suitable for toddlers and young kids
  • Dimensions designed for comfortable seating and riding

Cons:

  • Drive mode requires pedaling, which may tire some children quickly
  • Limited to outdoor use due to size and design
  • Not suitable for children under 3 years old

My Practical Opinion

This ride-on excavator is a great choice for parents looking for a realistic construction vehicle toy that encourages active play without the hassle of batteries or complex controls. It’s especially fitting for toddlers and young kids who enjoy outdoor activities and imaginative role play. Assembly and use are straightforward, offering peace of mind for caregivers.

While the pedal mechanism may be a bit challenging for very young or less active children, it’s also a good way to help build strength and coordination. The safety of the materials and the functional horn add to the overall play experience. If you’re looking for a durable and engaging ride-on toy, this model fits well into most backyard play setups.

Best for / Why

Best for Why
Toddlers and young kids (3+ years) Designed with safe materials and manageable size for small children
Parents seeking battery-free toys Pedal-powered design means no charging or batteries needed
Kids who enjoy construction and role-play Realistic digging functions and horn enhance imaginative play
Outdoor play enthusiasts Durable build and easy steering support active outdoor use

Albott 24v Ride On Tractor

Best Realistic Ride On Construction Vehicle 2026 delivering versatile outdoor fun for kids ages 3-8.

The Albott 24V Ride on Tractor is a versatile electric vehicle designed for kids aged 3 to 8, combining a trailer and front loader in a 3-in-1 adventure. It offers multiple play modes to keep children engaged, with features like dual motors and all-terrain wheels to handle outdoor surfaces such as grass and gravel. Its bright yellow color and realistic LED lights add to the authentic construction vehicle experience.

In everyday use, this ride-on tractor proves reliable and easy to operate thanks to soft-start technology and adjustable speed settings. The ergonomic seat with safety belt and sturdy frame ensure a steady, safe ride for young drivers. Built-in music options and a realistic horn make outdoor playtime more enjoyable, making it a consistent favorite for kids who love construction vehicles.

Pros:

  • 3-in-1 design keeps playtime fresh and versatile
  • Dual motors provide strong power for varied terrains
  • Soft-start and speed adjustment for safety and control
  • Comfortable seat with safety belt and protective frame
  • Built-in music and sound features enhance the experience
  • Durable, wear-resistant all-terrain tires
  • Large capacity supports kids up to 65 lbs

Cons:

  • Relatively heavy at nearly 69 pounds, which may limit portability
  • No detailed battery runtime information provided
  • May be too large for very small yards or indoor use

My Practical Opinion

This ride-on tractor is well suited for families looking for a durable and engaging outdoor vehicle for children between 3 and 8 years old. It’s straightforward to set up and offers safety features that give parents peace of mind while kids drive around. Beginners will find the adjustable speeds helpful, while more confident riders can enjoy the power and realistic functions.

If you have outdoor space and want a toy that grows with your child’s skills, this Albott tractor fits the bill. Just be mindful of the weight if you plan to move it frequently. Overall, it’s a reliable choice for active kids who enjoy imaginative play with construction themes.

Best for Why
Kids ages 3-8 Sized and designed specifically for younger children with safety features
Outdoor play enthusiasts Handles grass, dirt, and gravel with all-terrain wheels and dual motors
Parents seeking versatile toys 3-in-1 design offers variety and extended play value
Gift buyers Bright, fun design and realistic features make it an appealing present

How To Choose Best Realistic Ride On Construction Vehicle 2026 For Your Needs

Choosing the best realistic ride-on construction vehicle for 2026 involves balancing safety, durability, and fun to ensure a rewarding experience for your child.

  • Is the vehicle size appropriate for your child’s age and height?
  • Does it feature sturdy construction and quality materials?
  • Are the safety features, such as seat belts or speed limits, adequate?
  • Is the battery life or power source sufficient for extended playtime?
  • Does the design include realistic details to enhance imaginative play?
  • How easy is it to operate and maintain the vehicle?

If you still have questions, the FAQs help.

Faqs Of Best Realistic Ride On Construction Vehicle 2026

Is the Best Realistic Ride On Construction Vehicle 2026 safe for kids?

Yes, it meets all safety standards with secure seat belts and stable design. Always supervise children during use to ensure safety.

What size is ideal for a child using this ride on construction vehicle?

Choose a size that fits your child’s height and weight for comfort and control. Check product specs to match the recommended age range.

How do I clean the Best Realistic Ride On Construction Vehicle 2026?

Wipe down with a damp cloth and mild soap. Avoid harsh chemicals to keep the vehicle’s finish intact and safe for kids.

Can the vehicle handle daily outdoor use?

Yes, it is designed for daily play with durable materials. Regular cleaning and maintenance help extend its lifespan outdoors.

Are there any safety features unique to this 2026 model?

The 2026 model includes enhanced stability controls and softer edges. These upgrades reduce risk during active play.

How do I store the ride on construction vehicle when not in use?

Store it in a dry, shaded area to prevent damage. Covering it protects from dust and weather, keeping it clean and safe.

Final Verdict: Best Realistic Ride On Construction Vehicle 2026 For Most People

When selecting the best realistic ride on construction vehicle, consider the balance between durability, ease of use, and the level of detail that enhances the play experience. It’s important to think about the child’s age and interests to ensure the vehicle feels engaging and safe.

Also, pay attention to the battery life and the overall build quality to guarantee long-lasting fun. Ultimately, the right choice is one that blends practicality with imaginative play seamlessly.

Focus on what will bring the most joy and value over time.

How to Teach Kids to Ride Electric Scooter Safely Expert Tips

How to Teach Kids to Ride Electric Scooter Safely: Expert Tips

If you want your child to enjoy the fun of riding an electric scooter without worries, teaching them how to do it safely is a must. You might wonder where to start or how to make sure they stay protected while learning.

In this guide, you’ll discover simple, practical steps to help your kid build confidence and ride safely. From choosing the right gear to understanding local rules and practicing key skills, you’ll find everything you need to keep your child safe and happy on their electric scooter.

Keep reading, because your child’s safety and enjoyment depend on it.

How to Teach Kids to Ride Electric Scooter Safely: Expert Tips
How to Teach Kids to Ride Electric Scooter Safely: Expert Tips 47

Age And Readiness

Teaching kids to ride electric scooters safely starts with understanding their age and readiness. Age alone does not guarantee a child is ready to ride. Readiness depends on physical ability, coordination, and understanding safety rules. Parents must evaluate these factors carefully before allowing scooter rides. Proper timing helps prevent accidents and builds confidence.

Minimum Age Requirements

Most manufacturers recommend children be at least 8 years old to ride electric scooters. This age aligns with basic motor skills and balance development. Younger kids may struggle with controlling speed and steering. Some scooters have specific age limits printed in their manuals. Following these guidelines ensures safer riding experiences for children.

Assessing Maturity And Skills

Beyond age, assess your child’s maturity level. Can they follow safety instructions consistently? Do they understand traffic signals and basic road safety? Observe their coordination and balance on a non-motorized scooter or bike first. Confidence in these areas indicates readiness for an electric scooter. Patience is key; children develop skills at different rates.

Local Laws And Regulations

Check local laws before your child rides an electric scooter. Age restrictions vary by city and state. Some places require helmets or limit where scooters can be ridden. Fines or penalties may apply for breaking rules. Staying informed protects your child and others on the road. Visit official websites or contact local authorities for accurate information.

Choosing The Right Scooter

Choosing the right electric scooter is key to safe riding for kids. The right scooter fits their size and skill level. It also helps build confidence and control. Select a scooter that matches your child’s age and height. This makes learning easier and safer. Consider features designed for children to protect them during rides.

Size And Weight Considerations

Choose a scooter that suits your child’s height and weight. The deck should be wide enough for stable footing. Check the scooter’s maximum weight limit. A too-heavy scooter is hard to control. A too-light scooter may feel unstable. The scooter’s handlebar height should adjust to the child’s height. This helps maintain balance and control.

Speed Limits And Controls

Select scooters with speed limits suitable for kids. Lower speeds reduce the risk of injury. Look for scooters with easy-to-use brakes. Controls should be simple and responsive. Some scooters have speed limiters or beginner modes. These features keep speed safe while kids learn. Teach children to use brakes gently to avoid falls.

Kid-friendly Features

Choose scooters with safety features made for kids. Non-slip decks prevent feet from slipping. Bright colors or lights improve visibility. Some scooters have shock absorbers for a smoother ride. Safety certifications show the scooter meets quality standards. Look for scooters with rounded edges and secure wiring. These details keep kids safe during rides.

Safety Gear Essentials

Teaching kids to ride electric scooters safely starts with proper safety gear. Protective equipment lowers the risk of injury. Kids feel more confident when they wear the right gear. Make sure every ride includes essential safety items. Focus on helmet, pads, gloves, and visibility tools. These basics keep young riders secure and visible.

Helmet Selection And Fit

Choose a helmet designed for scooters or bikes. Check for safety certifications like CPSC or ASTM. The helmet must fit snugly without being too tight. Adjust straps so the helmet stays in place. Position the helmet level on the head, not tilted back. Replace helmets after any crash or impact.

Protective Pads And Gloves

Use knee and elbow pads to protect joints from falls. Select pads with soft padding and durable outer shells. Gloves improve grip and shield hands from scrapes. Look for gloves with reinforced palms and breathable fabric. Teach kids to always wear these pads before riding. This gear helps reduce cuts and bruises.

Visibility Enhancements

Add bright or reflective clothing to increase visibility. Attach reflective stickers or lights to the scooter. Use LED lights on helmets or backpacks for evening rides. Bright colors make kids easier to see in low light. Teach children to ride in well-lit areas whenever possible. Visibility helps drivers and pedestrians notice young riders quickly.

Safe Riding Locations

Choosing the right place for your child to ride an electric scooter is key. Safe riding locations help build confidence and reduce risks. Start with areas that keep your child away from dangers like traffic and rough surfaces.

Flat, Open Spaces

Pick flat areas without hills or slopes. Open spaces give kids room to practice turns and stops. Parks, empty parking lots, and quiet playgrounds are good choices. These spots let kids focus on riding without many obstacles.

Avoiding Traffic And Hazards

Stay away from busy streets and driveways. Cars, bikes, and pedestrians can surprise young riders. Check the area for hazards like potholes, rocks, or broken glass. These can cause falls or accidents. A clear path makes riding safer and less stressful.

Weather And Surface Conditions

Choose dry days for scooter practice. Wet or icy surfaces make wheels slip easily. Avoid gravel or uneven pavement, which can cause loss of balance. Smooth, clean sidewalks or paved trails work best. Good weather and surfaces help kids enjoy riding safely.

Step-by-step Riding Skills

Teaching kids to ride an electric scooter safely requires patience and clear steps. Breaking down the riding skills into simple parts helps children learn better. Start with the basics and build their confidence gradually. Each step focuses on a key skill needed for safe riding.

Mounting And Balance

Show your child how to place one foot on the scooter deck. Keep the other foot on the ground for support. Teach them to stand straight and look forward. Practice standing still and balancing before moving. Good balance helps prevent falls and builds confidence.

Pushing Off And Gliding

Instruct your child to push off gently with the foot on the ground. Let them glide while keeping the other foot on the deck. Encourage short pushes at first. Teach them to lift the pushing foot and balance during glides. This step improves control and comfort on the scooter.

Turning And Steering Techniques

Explain how to lean the body slightly to turn. Show how to use the handlebars to steer smoothly. Practice wide turns before trying sharp ones. Teach your child to slow down before turning. Proper turning skills prevent accidents and help navigate safely.

How to Teach Kids to Ride Electric Scooter Safely: Expert Tips
How to Teach Kids to Ride Electric Scooter Safely: Expert Tips 48

Building Confidence

Building confidence is the key to teaching kids how to ride an electric scooter safely. Confidence grows as children practice and feel more in control. It helps them stay calm and focused while riding. Confidence lowers the chance of accidents and makes the learning process fun.

Supervised Practice Sessions

Start with short practice sessions in a safe area. Always watch your child closely to guide and protect them. Give clear, simple instructions and praise their efforts. Supervised practice helps kids feel secure and learn the basics without fear.

Gradual Speed Increase

Let your child begin at a slow, comfortable speed. Increase speed slowly as they get better at balancing and steering. This step-by-step approach prevents overwhelm and builds trust in their skills. Slow progress means safer learning.

Handling Obstacles And Stops

Teach kids to notice and respond to obstacles ahead. Practice stopping smoothly and safely every time. Show how to slow down before turns or bumps. Learning to handle these situations builds riding confidence and reduces risks.

Rules And Awareness

Teaching kids to ride electric scooters safely requires clear rules and strong awareness. These help children understand their environment and act responsibly. Safety grows when kids follow traffic rules and respect pedestrians.

Awareness means noticing what is around and making smart choices quickly. Teaching kids to focus and avoid distractions keeps them safe on the road. Below are important points about rules and awareness every child should learn.

Traffic And Pedestrian Etiquette

Teach kids to always stop at red lights and stop signs. They should ride on bike lanes or sidewalks where allowed. Remind them to yield to pedestrians and give way at crosswalks.

Riding at a safe speed near people is important. Kids must look both ways before crossing streets. Using hand signals to turn helps others know their next move.

Situational Awareness Tips

Kids should scan their surroundings regularly. Spotting cars, bikes, and obstacles early avoids accidents. Teach them to keep a safe distance from parked cars and curbs.

Encourage kids to listen for sounds like car horns or sirens. Being alert helps them react faster to dangers. Practicing in quiet areas builds good awareness skills first.

Avoiding Distractions

Riding needs full attention. Tell kids to avoid using phones or headphones while riding. Talking or playing with friends can cause loss of focus.

Remind them to keep both hands on the scooter handles. Distractions increase the risk of falling or crashing. Safe riding means staying alert at all times.

How to Teach Kids to Ride Electric Scooter Safely: Expert Tips
How to Teach Kids to Ride Electric Scooter Safely: Expert Tips 49

Parental Supervision

Parental supervision plays a vital role in teaching kids to ride electric scooters safely. Adults must stay close and watch every move. This presence helps prevent accidents and builds the child’s confidence. Careful supervision also ensures that kids follow safety rules strictly.

Parents must be alert and ready to step in if needed. It creates a safer environment for kids to practice and enjoy riding their scooters. With the right guidance, children learn to respect the scooter and the surroundings. This leads to safer riding habits that last a lifetime.

Setting Boundaries

Parents should set clear and firm boundaries for scooter use. Define where kids can ride, such as driveways or parks. Avoid busy streets or crowded areas. Boundaries help children understand safe zones and keep them away from traffic. Establish rules about wearing helmets and protective gear every time. Clear limits reduce risks and build good habits.

Monitoring Riding Time

Control the length of scooter rides to prevent tiredness. Short, supervised sessions keep kids alert and focused. Long rides can lead to carelessness and accidents. Parents should watch for signs of fatigue or distraction. Set a daily limit and stick to it firmly. This keeps the experience fun and safe.

Emergency Preparedness

Parents must prepare for possible emergencies before riding. Teach kids how to stop the scooter quickly and safely. Keep a first-aid kit nearby during every ride. Explain what to do in case of a fall or crash. Show kids how to call for help if needed. Being ready reduces panic and handles incidents calmly.

Frequently Asked Questions

How Old Should A Kid Be To Ride An Electric Scooter?

Kids should be at least 8 years old to ride an electric scooter, depending on local laws and maturity. Always supervise younger riders and ensure they wear safety gear.

How Safe Are Electric Scooters For Kids?

Electric scooters can be safe for kids with proper supervision, age-appropriate models, and protective gear like helmets. Teach riding skills and follow local laws. Choose flat, traffic-free areas for practice to minimize risks. Regularly check the scooter’s condition to ensure safety during rides.

How To Teach A 5 Year Old To Ride A Scooter?

Choose a flat, safe area for practice. Show how to place one foot on the scooter and push with the other. Encourage gentle pushes and balancing by leaning to steer. Always supervise and ensure the child wears a helmet for safety.

Keep sessions short and positive.

Are Electric Scooter Accidents Common?

Electric scooter accidents occur frequently due to rider inexperience and traffic risks. Proper safety gear and training reduce accidents significantly.

Conclusion

Teaching kids to ride electric scooters safely takes patience and practice. Start with simple steps in a safe, open space. Always use proper safety gear like helmets and pads. Set clear rules about where and how fast they can ride.

Supervise younger kids closely to prevent accidents. Encourage steady progress and praise their efforts. Safety builds confidence and makes riding fun. Keep revisiting safety tips regularly to form good habits. Safe riding helps kids enjoy their scooters without harm.

Can Ride-On Cars Be Used on Pavement Safety Tips & Guide

Can Ride-On Cars Be Used on Pavement? Safety Tips & Guide

Every child’s face lights up when they see a ride-on car. These miniature vehicles, powered by batteries or pedals, offer a taste of adventure and independence. Parents, though, often wonder about safety and where these cars can be used. One of the most common questions is: Can ride-on cars be used on pavement? The answer isn’t always straightforward. Ride-on cars come in many shapes, sizes, and power levels. Pavement, too, can mean smooth sidewalks, rough asphalt, or even busy driveways.

This article will guide you through everything you need to know about ride-on cars on pavement. From the types of ride-on cars, surface compatibility, safety tips, and the best models for pavement use, to care and maintenance—this guide covers it all.

By the end, you’ll feel confident making the right decision for your child’s enjoyment and safety.

Understanding Ride-on Cars

Ride-on cars are toys that children can sit in and drive. They are designed to mimic real vehicles, with working steering wheels, pedals, and sometimes even sound effects. There are different types, each with unique features.

TL;DR Summary

This 2026 guide confirms that most ride-on cars perform exceptionally well on pavement, provided parents choose models with appropriate wheel materials and motor power. It details essential safety precautions, maintenance schedules, and the best models for sidewalks and driveways to ensure a smooth and secure play experience.

Types Of Ride-on Cars

1. Electric Ride-on Cars

These are powered by rechargeable batteries, usually 6V, 12V, or 24V. They have motors that move the car forward and backward, and sometimes offer remote control for parents.

2. Pedal Ride-on Cars

These are powered by the child’s feet, much like a bicycle or tricycle. They are slower and good for younger children.

3. Push Ride-on Cars

Parents or older kids push these cars while the child sits and steers. They are best for toddlers.

4. Manual Ride-on Cars

These include classic cars with pedals, as well as balance bikes and scooters.

Each type responds differently to various surfaces, including pavement.

Why Surface Compatibility Matters

Ride-on cars aren’t created for all surfaces. Some work well on grass, others on carpet, and some are best for smooth, hard surfaces like pavement. If you use the wrong car on the wrong surface, you risk damaging the car, causing frustration, or even creating safety hazards.

Pavement: What Counts And Why It Matters

“Pavement” is a broad term. It can mean concrete sidewalks, asphalt driveways, or paved paths in parks. Each type has different textures, slopes, and levels of traffic.

Common Types Of Pavement

  • Concrete Sidewalks: Usually smooth, but may have cracks or bumps.
  • Asphalt Driveways: Slightly rougher, can get hot in the sun.
  • Paved Park Paths: Designed for walking and cycling, generally smooth but can have twigs, leaves, or gravel.

Why does this matter? Because ride-on cars interact with pavement differently than with grass or dirt. Wheels, motors, and weight all play a role.

Are Ride-on Cars Designed For Pavement Use?

Most ride-on cars are designed to be used on hard, flat surfaces. Pavement is often ideal, but there are important details to consider.

Manufacturer Recommendations

Many brands specify where their products should be used. For example, a 6V electric car may state “for indoor or smooth outdoor use only. ” A 24V car might say “suitable for pavement, hard-packed dirt, and grass. ” Always check the manual or box before letting your child drive on pavement.

Wheel Material And Design

The wheels determine how well a ride-on car handles pavement.

  • Plastic Wheels: Most common, but they can slip on wet or sloped pavement. They may wear down quickly on rough asphalt.
  • Rubber-Coated Wheels: Offer better grip and smoother rides. These are better for frequent pavement use.
  • Foam or Air-Filled Tires: Rare but offer the best shock absorption and grip.

Battery And Motor Strength

A 6V car may struggle on uneven pavement or slight slopes. A 12V or 24V car handles pavement better, especially if the child is older or heavier.

Pavement Pros And Cons For Ride-on Cars

Let’s look at why pavement is both good and sometimes challenging for ride-on cars.

Benefits

  • Smooth Ride: Hard surfaces allow for even, predictable movement.
  • Better Control: Steering and stopping are easier.
  • Higher Speeds: Cars move faster than on grass or carpet.
  • Longer Battery Life: Motors don’t strain as much as on rough terrain.

Challenges

  • Slippery When Wet: Rain or dew can make the pavement slick, causing wheels to lose grip.
  • Heat: Asphalt can get extremely hot in summer, which could damage tires or be uncomfortable for children.
  • Obstacles: Cracks, stones, or sticks can cause jolts or even tip-overs.
  • Traffic: Pavement often means driveways or paths where cars, bikes, or pedestrians are present.
Can Ride-On Cars Be Used on Pavement? Safety Tips & Guide
Can Ride-On Cars Be Used on Pavement? Safety Tips & Guide 53

Best Types Of Ride-on Cars For Pavement

Not all ride-on cars are equal when it comes to pavement. Here’s a look at the best options.

TypeBest ForRecommended AgePavement Suitability
6V ElectricToddlers1.5–3 yearsExcellent on smooth pavement
12V ElectricPreschoolers3–6 yearsGreat for most pavement
24V ElectricOlder children5–8 yearsHandles all pavement types
Pedal CarsAll ages2–8 yearsGood, but slower
Push CarsToddlers with supervision1–3 yearsBest on smooth, flat pavement

Important Safety Considerations

When using ride-on cars on pavement, safety must come first. Pavement increases the risk of falls and collisions. Here’s how to protect your child.

Supervision

Always supervise children, especially near streets or driveways. Even if the car is slow, children can steer into danger quickly.

Protective Gear

While not always required, gear like helmets, knee pads, and elbow pads can prevent scrapes and bruises. This is especially true for faster cars or those used on sloped pavement.

Pavement Condition

Check the pavement before play. Look for:

  • Cracks or potholes
  • Wet or icy patches
  • Loose gravel or sand
  • Steep slopes or driveways

Traffic Awareness

Teach children to stop at driveways, crossings, or corners. Set clear boundaries—never allow play near busy roads.

Remote Controls

Many electric ride-on cars now include parent remotes. These let you stop the car instantly if your child heads toward danger.

Battery And Motor Checks

Pavement is easier on motors than grass, but regular checks are still important. Make sure wires and batteries are secure, and the motor doesn’t overheat.

How Pavement Affects Ride-on Car Performance

The type and condition of pavement directly influence how a ride-on car works.

Traction

Smooth concrete gives good grip. Old, rough pavement can wear wheels down or make the ride bumpy. Wet pavement is slippery, especially for plastic wheels.

Speed And Range

On pavement, cars move faster and the battery lasts longer. This is because the motor doesn’t have to work as hard.

Wear And Tear

Frequent pavement use causes more wheel wear, especially with plastic. Rubber wheels last longer but still need checking for cracks or splits.

Examples

  • A 12V car may run for 1–2 hours on smooth pavement, but only 30–40 minutes on grass.
  • Plastic wheels might last for several months on smooth concrete but only weeks on rough, gritty asphalt.

Best Practices For Using Ride-on Cars On Pavement

If you want the safest and most fun experience, follow these guidelines.

Choose The Right Car

Pick a model suited for pavement. Look for:

  • Rubber or rubber-coated wheels
  • Sturdy construction
  • Parental remote (for young children)
  • Good battery life

Prepare The Area

Clear the pavement of rocks, sticks, or other obstacles. If using in a driveway, block off access to the street.

Set Rules

Make sure your child knows:

  • Where they can and can’t drive
  • To stop at all driveways
  • To watch for people and pets

Inspect Regularly

Before each use, check:

  • Tires for wear or cracks
  • Battery charge level
  • That all bolts and pieces are tight

Weather Matters

Avoid using ride-on cars on wet or icy pavement. Heat can also be a problem—check that the seat and wheels aren’t too hot before play.

Can Ride-On Cars Be Used on Pavement? Safety Tips & Guide
Can Ride-On Cars Be Used on Pavement? Safety Tips & Guide 54

Comparing Pavement With Other Surfaces

How does pavement stack up against other options like grass, dirt, or carpet?

SurfaceRide QualityBattery LifeSafetyMaintenance
PavementSmooth, fastLongestModerate (watch for falls/traffic)Wheel wear
GrassSlower, unevenShorterSofter fallsMotor strain
Dirt/GravelBumpy, unevenShortHard falls, more dustDust in motor
CarpetVery slowShortestSafe, but boringMinimal

Pavement gives the best overall performance, but only if you manage the risks.

What To Look For In A Pavement-friendly Ride-on Car

If you’re buying a ride-on car mainly for pavement use, keep these features in mind.

Wheel Type And Size

  • Large rubber wheels offer the best grip.
  • Wider tires spread the weight, making the ride smoother.

Motor Power

  • 12V or 24V is best for older kids or uneven pavement.
  • Lower voltage is fine for toddlers and very smooth surfaces.

Suspension

Some higher-end cars include real suspension systems. This makes bumps less jarring and is worth considering if your pavement is rough.

Weight Capacity

Make sure the car can support your child’s weight. Overloading reduces battery life and can damage the car.

Battery Life

Look for models with larger batteries or quick charging options.

Parental Controls

A remote control is a must for younger children, especially on open pavement.

Realistic Features

Features like working headlights, horns, or seat belts add to safety and fun.

Real-world Examples

Let’s look at how some popular models perform on pavement.

  • Power Wheels Dune Racer (12V):

Great for smooth and slightly rough pavement. Rubberized tires give good grip. Battery lasts about 1 hour on sidewalks.

  • Peg Perego John Deere Gator (12V):

Designed for both grass and pavement. Moves fastest on pavement. Parent remote adds safety.

  • Rollplay 6V Mini Cooper:

Best on flat, smooth pavement. Lightweight, but plastic wheels wear quickly.

  • Razor Dirt Quad (24V):

Handles rough pavement and even light gravel. Air-filled tires and real suspension.

Common Mistakes When Using Ride-on Cars On Pavement

Avoid these errors for a safer, longer-lasting experience.

Neglecting Wheel Maintenance

Plastic wheels wear fast on rough pavement. Check them often and replace as needed. Worn wheels lose grip and can cause accidents.

Ignoring Weather

Wet pavement is dangerous. Don’t let children ride after rain or early in the morning when dew is present. Hot pavement can also be a burn risk.

Overloading The Car

Follow the weight limits. Too much weight strains the motor and can crack the chassis.

Skipping Supervision

Even slow ride-on cars can get into trouble on pavement. Always keep an eye on your child, especially near driveways or streets.

Not Setting Boundaries

Children may drive out of sight or into unsafe areas. Mark clear limits for where they can play.

Tips For Extending Ride-on Car Life On Pavement

You can help your ride-on car last longer with a few easy habits.

1. Clean Wheels Regularly

Dirt, sand, and small stones can get stuck and cause wear.

2. Charge Battery Fully

Don’t let batteries drain completely. This keeps them healthy and maximizes playtime.

3. Store Indoors

Sun and rain can damage plastic and electronics. Bring the car inside or cover it when not in use.

4. Lubricate Moving Parts

A little oil on axles and steering joints reduces friction and extends life.

5. Check All Fasteners

Vibration from pavement can loosen screws or bolts. Tighten them regularly.

The Impact Of Pavement On Child Development

Pavement use isn’t just about fun—it also helps children grow in important ways.

Physical Development

Driving on pavement requires balance, coordination, and reaction time. Children practice steering, braking, and speed control, which all build motor skills.

Confidence And Independence

Operating a ride-on car on pavement gives a sense of freedom and achievement. Children learn to judge speed, distance, and obstacles.

Social Play

Wide, open pavement areas are great for group play. Kids can race, take turns, and develop social skills.

Safety Awareness

Learning about traffic, boundaries, and safe driving starts early. These lessons transfer to bikes and, later, real cars.

Special Considerations For Urban And Suburban Areas

Not all neighborhoods are the same. Here’s what to keep in mind.

Urban Areas

  • Sidewalks may be crowded or close to streets.
  • More traffic means higher risk.
  • Consider parks or closed-off play areas.

Suburban Areas

  • Driveways are common play spots but can be dangerous if cars are moving.
  • Cul-de-sacs or quiet streets are better but require supervision.

Gated Communities Or Parks

  • Some have paths designed for children’s toys.
  • Always check rules before using ride-on cars in shared spaces.

Pavement Use: Legal And Community Rules

Most places allow ride-on cars on private driveways and some public parks. However:

  • Sidewalks: Usually permitted, but watch for pedestrians.
  • Roadways: Not safe or legal. Cars are too small and slow.
  • Parks: Rules vary. Some allow ride-on cars, others do not.
  • HOAs: Some homeowner associations restrict motorized toys in common areas.

Always check local guidelines. Some cities have specific rules about battery-powered toys on sidewalks.

Can Ride-On Cars Be Used on Pavement? Safety Tips & Guide
Can Ride-On Cars Be Used on Pavement? Safety Tips & Guide 55

Alternatives To Pavement

If pavement isn’t available or safe, consider these options:

  • Indoor Play: Use large, empty rooms or garages.
  • Grass: Slower, but softer falls and less wear.
  • Playground Paths: Many parks have smooth, safe paths for toys.
  • Sports Courts: Basketball or tennis courts are ideal when not in use.

Non-obvious Insights For Pavement Use

Many parents miss these important points:

1. Wheel Upgrades Make A Huge Difference

Some brands sell upgraded rubber wheels for popular models. This simple change can double wheel life and improve safety.

2. Battery Health Is Surface-dependent

Using your ride-on car mostly on pavement puts less strain on the battery, which can extend its lifespan by months compared to grass or dirt use.

3. Sun Damage Is Real

Pavement reflects a lot of sunlight. Store cars in the shade or cover them to prevent faded paint and brittle plastics.

4. Remote Control Range Matters

On wide pavement areas, the parent remote needs good range. Cheaper cars often have weak remotes that cut out at short distances.

5. Noise Levels

Hard pavement increases the noise of plastic wheels. For quiet neighborhoods, consider rubber wheels to reduce sound.

When Pavement Isn’t Suitable

Sometimes, pavement isn’t the right choice:

  • Steep Driveways: Too risky for rollovers.
  • Busy Streets: Never allow play near traffic.
  • Broken Pavement: Cracks and potholes can be dangerous.

In these cases, find a safer surface or supervise extra closely.

Maintenance Table: Pavement Vs. Grass Use

Here’s a quick look at how often you should check key parts, depending on where you use your ride-on car.

PartPavement UseGrass Use
WheelsCheck weekly for wearCheck monthly for cracks
BatteryCharge after every useCharge after every use
Bolts/ScrewsTighten every 2 weeksTighten monthly
BodyWipe down after dusty ridesClean for mud
MotorListen for noise monthlyCheck for overheating monthly

Where To Learn More

Many manufacturers offer detailed guides on safe and proper use for each model. For more comprehensive information, the Wikipedia page on electric vehicles is a valuable resource on the technology behind ride-on cars.

Final Thoughts

So, can ride-on cars be used on pavement? The answer is a confident yes—for most models and most types of pavement, with proper safety checks and supervision. Pavement provides a smooth, fast, and exciting environment for children to explore. However, always consider the type of car, the condition of the pavement, and most importantly, your child’s safety.

With the right preparation and awareness, ride-on cars and pavement make the perfect match for active, happy play.

Frequently Asked Questions

Can All Ride-on Cars Be Used On Pavement?

Not all ride-on cars are suitable for pavement. Electric cars with rubber or rubber-coated wheels are best. Lightweight models with plastic wheels may struggle or wear out quickly. Always check the manufacturer’s guidelines.

Is It Safe For Toddlers To Use Ride-on Cars On Pavement?

Yes, but only with close supervision. Choose cars designed for young children, use protective gear, and keep play in safe, enclosed areas away from traffic.

Do Ride-on Cars Damage Pavement Surfaces?

Most ride-on cars do not harm pavement, but very heavy or metal-wheeled models could leave marks. Plastic wheels may wear down quickly, leaving bits of plastic behind.

How Do I Make Ride-on Cars Safer On Pavement?

Use cars with rubber wheels, always supervise play, set clear boundaries, and avoid wet or hot pavement. Remote controls add an extra layer of safety for younger children.

What Is The Best Voltage For Ride-on Cars On Pavement?

A 12V or 24V ride-on car is ideal for pavement, offering enough power for smooth, fast rides. Lower voltage cars (6V) are fine for smooth sidewalks and very young children.

By following these tips and insights, your child’s ride-on car adventures on pavement can be both thrilling and safe.

How Long Does a 24V Ride-On Battery Last Expert Insights & Tips

How Long Does a 24V Ride-On Battery Last? Expert Insights & Tips

Every parent who buys a ride-on toy for their child wants the fun to last as long as possible. If you’ve chosen a 24V ride-on car, you probably wonder: How long does a 24V ride-on battery last? The answer is not as simple as a single number. Battery life depends on many factors, including how it’s used, the surface it drives on, the weight it carries, and how well you care for it. Understanding these factors can help you get the most out of your investment and keep your child happy for longer rides.

In this guide, you’ll learn everything you need to know about the lifespan and runtime of 24V ride-on batteries. We’ll look at what really affects battery duration, how to compare different batteries, and what you can do to extend battery life.

You’ll also discover some insights that many buyers miss, so you can make smart choices and avoid surprises.

What Is A 24v Ride-on Battery?

A 24V ride-on battery is a rechargeable power source used in electric ride-on cars, trucks, ATVs, and other motorized toys for children. The “24V” refers to 24 volts of electrical potential, which is often made by connecting two 12V batteries in series. These batteries provide more power than the popular 6V and 12V versions, allowing for higher speeds and the ability to carry older or heavier children.

Most 24V ride-on batteries are sealed lead-acid (SLA) or lithium-ion types. SLA batteries are heavier but less expensive, while lithium-ion batteries are lighter and last longer but cost more. The battery’s voltage and capacity (measured in amp-hours, or Ah) determine how long the ride-on can run before needing a recharge.

TL;DR Summary

A 24V ride-on battery typically offers 45 minutes to 2 hours of runtime and a 1-3 year lifespan depending on maintenance and usage. This guide provides expert 2026 strategies to extend battery performance and choose the best high-capacity replacements.

How Long Does A 24v Ride-on Battery Last Per Charge?

When people ask about how long a 24V ride-on battery lasts, they often mean “How long can my child drive the car before it stops and needs to be charged again?” This is called the runtime per charge.

Most 24V ride-on vehicles last between 45 minutes to 2 hours of continuous use on a full charge. However, this is only an average. The actual runtime depends on key factors:

  • Battery capacity (Ah): Higher Ah means more energy and longer playtime.
  • Weight of the rider(s): More weight puts more strain on the battery.
  • Type of surface: Flat pavement uses less power than grass, sand, or hills.
  • Speed settings: High speed drains the battery faster.
  • Additional features: Lights, sounds, and music players use extra energy.
  • Battery age and health: Old or poorly maintained batteries hold less charge.

Here’s a simple example: A 24V ride-on with a 7Ah battery carrying a 60-pound child on flat pavement might last about 1.5 hours. But if the child drives over grass or up hills, that time might drop to 45 minutes.

Factors That Affect 24v Ride-on Battery Runtime

Battery runtime can vary a lot, even between similar-looking ride-ons. Here are the main factors that make a big difference:

1. Battery Capacity (amp-hours, Ah)

The amp-hour (Ah) rating tells you how much energy the battery can store. Higher Ah means longer playtime per charge. Most 24V ride-on batteries range from 7Ah to 14Ah.

2. Rider’s Weight

Heavier children or carrying two kids at once makes the motor work harder. This uses more power and shortens runtime. Always check the manufacturer’s recommended weight limit.

3. Surface And Terrain

Driving on smooth concrete or pavement uses less energy than grass, gravel, sand, or uphill paths. Uneven ground or hills need more power and will cut battery life short.

4. Speed Settings

Most 24V ride-ons have multiple speed options. Higher speeds use the battery faster. Letting your child drive at lower speeds can extend runtime.

5. Extra Features

Many ride-ons come with lights, music players, Bluetooth, or even MP3 players. These features are fun but use extra power. Turning off non-essential features can help the battery last longer.

6. Battery Age And Maintenance

Batteries naturally lose capacity over time, especially if not properly cared for. Storing batteries fully charged and avoiding full discharges helps them last longer.

7. Outdoor Temperature

Extreme heat or cold can reduce battery efficiency and runtime. Most ride-on batteries perform best between 15°C and 25°C (59°F to 77°F).

8. Driving Habits

Frequent stops and starts, or riding up and down steep slopes, uses more energy than gentle, steady driving.

Typical 24v Ride-on Battery Runtimes By Model

To give a clearer picture, let’s look at some real-world examples of popular 24V ride-on vehicles and their typical runtimes:

ModelBattery CapacityRecommended Age/WeightAverage Runtime
24V Jeep Wrangler10Ah SLA3-8 yrs / up to 110 lbs1 – 1.5 hours
24V Lamborghini Aventador7Ah SLA3-7 yrs / up to 100 lbs45 mins – 1 hour
24V Razor Dirt Quad9Ah SLA8+ yrs / up to 120 lbs40 mins – 1 hour
24V Toyota Hilux Ride-On14Ah SLA3-8 yrs / up to 110 lbs1.5 – 2 hours
24V Tesla Model S Ride-On10Ah Lithium-ion3-8 yrs / up to 110 lbs1 – 2 hours

These are general numbers. Real runtime will depend on all the factors already mentioned.

How Long Does A 24v Ride-on Battery Last Over Its Lifetime?

Some people are asking: “How long before I need to buy a new battery?” This is about battery lifespan, not just runtime per charge.

A well-cared-for 24V ride-on battery usually lasts 1 to 3 years before needing replacement. The actual lifespan depends on:

  • Type of battery: Lithium-ion batteries last longer than sealed lead-acid.
  • Number of charge cycles: Each full charge and discharge is one cycle. Most SLA batteries last 200–300 cycles; lithium-ion can reach 500+ cycles.
  • Storage and maintenance: Storing fully charged and away from extreme temperatures helps.
  • Usage frequency: Daily use wears batteries faster than occasional use.

If the battery starts to hold less charge, takes less time to charge, or the ride-on runs much shorter than before, it’s likely time to replace the battery.

Comparison: 24v Vs. 12v Ride-on Battery Life

Many parents wonder if upgrading to 24V means longer playtime. Not always! Here’s a comparison:

Feature12V Ride-On24V Ride-On
Typical Speed3–5 mph5–8 mph
Runtime per Charge1–2 hours45 mins – 2 hours
Best for Age3–5 yrs5–8 yrs
Handles Grass/Hills?Not wellBetter
Battery Size/WeightSmaller, lighterBigger, heavier
Motor PowerLessMore

So, a 24V ride-on doesn’t always run longer per charge. It gives more power and speed, which can drain the battery faster. Runtime depends on both voltage and capacity (Ah).

How Long Does a 24V Ride-On Battery Last? Expert Insights & Tips
How Long Does a 24V Ride-On Battery Last? Expert Insights & Tips 59

How To Make A 24v Ride-on Battery Last Longer

Want to get the most runtime and lifespan from your ride-on battery? Here are some proven tips:

1. Charge Fully Before First Use

New batteries should be charged for 8–12 hours before the first ride, even if they look charged.

2. Avoid Over-draining

Don’t let the battery run completely flat. Recharge after each use.

3. Store Properly

Keep batteries in a cool, dry place. Don’t store in direct sunlight or freezing garages.

4. Top Up Regularly

If you won’t use the ride-on for a while, charge the battery every 1–2 months.

5. Turn Off When Not In Use

Always switch off the car and any lights/music to save power.

6. Keep Weight Within Limits

Don’t let older kids or more than the recommended number of children ride at once.

7. Drive On Flat Surfaces

Try to use the ride-on on smooth pavement instead of thick grass or hills.

8. Check Battery Connections

Loose wires or dirty contacts can make the battery drain faster.

9. Replace Old Batteries

If your ride-on is running much less than before, the battery may be worn out.

10. Use The Right Charger

Always use the charger provided by the manufacturer. Wrong chargers can damage the battery.

Signs Your 24v Ride-on Battery Needs Replacement

Batteries don’t last forever. Watch for these signs:

  • Short runtime: The car only runs a few minutes on a full charge.
  • Takes longer to charge: But still drains quickly.
  • Swollen or leaking battery: This is dangerous—replace immediately.
  • Ride-on won’t start: Even after a full charge.
  • Battery is more than 3 years old: Even with good care, most lead-acid batteries wear out by then.
How Long Does a 24V Ride-On Battery Last? Expert Insights & Tips
How Long Does a 24V Ride-On Battery Last? Expert Insights & Tips 60

Choosing The Right Replacement 24v Ride-on Battery

When your battery fails, picking a good replacement is key. Here’s what matters:

Check Compatibility

Not all 24V batteries are the same size or shape. Check your ride-on’s manual or the old battery for:

  • Voltage (24V)
  • Amp-hour (Ah) rating (try to match or go higher)
  • Physical size (must fit in the battery compartment)
  • Connector type (wires, plugs)

Sla Vs. Lithium-ion

  • Sealed Lead-Acid (SLA): Cheaper, heavier, 1–3 years lifespan.
  • Lithium-Ion: More expensive, lighter, lasts 2–5 years, holds charge better.

If budget allows, lithium-ion can give longer life and lighter weight, but always check for safe compatibility.

Buy From A Trusted Seller

Poor-quality batteries can be unsafe or have much lower capacity than claimed. Look for reputable brands and check reviews.

Don’t Just Go Bigger

A higher Ah (capacity) is usually fine if it fits, but never use a battery with higher voltage (like 36V) in a 24V ride-on. This can damage the car and be dangerous.

Charging A 24v Ride-on Battery: What To Know

Charging is simple but important for both runtime and battery health.

How Long Does Charging Take?

Most 24V ride-on batteries take 8–12 hours to charge from empty. Some lithium-ion models may charge in 4–6 hours with a fast charger.

Can You Overcharge?

Modern chargers often stop charging when full, but many ride-ons have simple chargers that keep charging as long as they’re plugged in. Unplug once the battery is full to avoid damage.

How Often Should You Charge?

Charge after every use. Don’t leave the battery empty for days or weeks, as it can lose capacity.

What If You Lose The Charger?

Buy a replacement with the same voltage and connector. Never try to use a higher-voltage charger.

Real-world Tips For Maximizing Battery Life

Parents and experienced users have found some clever ways to get more out of their 24V ride-on batteries:

  • Teach your child to drive gently: Smooth starts and steady speeds use less power than sudden stops and starts.
  • Rotate use between two batteries: If your child rides a lot, consider buying a second battery to swap in. This reduces deep discharges.
  • Clean the battery contacts: Dirt or corrosion where the battery plugs in can cause poor connections and wasted energy.
  • Watch for parasitic drain: Some ride-ons with radios or lights may slowly drain the battery even when switched off. Unplug the battery if storing for a long time.
  • Don’t use in extreme weather: Very hot or cold days can cut runtime by 20–50%.

How Battery Quality Impacts Runtime

Not all 24V ride-on batteries are created equal. Some cheaper replacements may promise high capacity but underperform. Key things to look for:

  • True Ah Rating: Some brands exaggerate the capacity. Trusted brands (like Yuasa, Power Wheels, Peg Perego) usually match what’s advertised.
  • Build Quality: Poor casings or cheap cells can overheat or fail early.
  • Warranty: Good batteries often come with a 6–12 month warranty.

A high-quality battery might cost more but often gives longer runtime and lifespan, making it cheaper in the long run.

How Long Does a 24V Ride-On Battery Last? Expert Insights & Tips
How Long Does a 24V Ride-On Battery Last? Expert Insights & Tips 61

Common Mistakes That Shorten 24v Ride-on Battery Life

Many beginners make mistakes that reduce battery life or safety. Watch out for these:

  • Letting the battery drain completely every time.
  • Leaving the battery uncharged for months (especially over winter).
  • Using the wrong charger (wrong voltage or cheap universal chargers).
  • Overloading the car with too many kids or too much weight.
  • Storing the ride-on in hot garages or outdoors in direct sun.
  • Ignoring early warning signs of battery trouble.

Avoiding these mistakes can easily add a year or more to your battery’s life.

Is Upgrading To A Bigger Battery Worth It?

Some parents consider upgrading to a higher Ah battery for longer runtime. Here’s what you should know:

  • Higher Ah means more playtime (if it fits in your ride-on).
  • Extra weight can slow the car slightly, especially if you upgrade a lot.
  • Never increase voltage (like using a 36V battery in a 24V car).
  • Check warranty: Modifying your ride-on may void it.
  • Better to buy a second battery and swap them if you need much longer playtime.

Environmental Impact And Safe Disposal

Batteries, especially lead-acid types, shouldn’t go in household trash. They contain chemicals that can harm the environment. Always recycle old batteries at an approved center. Many stores that sell batteries will take old ones for safe recycling.

For more information on battery recycling, visit the U.S. EPA’s battery recycling guide.

When To Call For Professional Help

If your ride-on car is not working after a battery swap, or if you see smoke, swelling, or leaks, stop using it immediately. Contact the manufacturer or a professional for help. Never try to repair a damaged battery yourself.

Frequently Asked Questions

How Do I Know If My 24v Ride-on Battery Is Fully Charged?

Most ride-ons have a charging light. Green means full, red means charging. If your charger does not have a light, charge for the recommended time (usually 8–12 hours). Unplug when done to avoid overcharging.

Can I Use A Car Battery In My 24v Ride-on Toy?

No. Car batteries are much larger, heavier, and deliver more power than ride-on toys are built for. This can damage the toy and be dangerous. Always use batteries designed for ride-on toys.

My Ride-on Car Runs For Only 10 Minutes. Is The Battery Bad?

If you’ve fully charged the battery and it lasts much less than before (for example, 10 minutes instead of 1 hour), the battery is likely worn out and needs replacing. Check for loose connections first, but most often, it’s time for a new battery.

Is It Safe To Leave The Charger Plugged In Overnight?

Most modern chargers stop charging when full. But many basic chargers do not. It’s best to unplug the charger when the battery is full or after the recommended charge time to avoid overheating or reduced battery life.

Can I Upgrade My 24v Ride-on To A Lithium-ion Battery?

In some cases, yes, but you must match voltage, size, and connector type. Lithium-ion batteries require special chargers and must be safely installed. Using the wrong battery can be unsafe and may void your warranty. Always check with the manufacturer before upgrading.

A 24V ride-on battery can bring hours of joy to your child. By understanding how long these batteries last and how to care for them, you can get the best value and avoid common problems. Whether you’re buying your first ride-on or replacing a tired old battery, these tips will help you make smart, safe choices and keep the fun rolling.